How To Create Date And Time Picker in an Android Application using Eclipse
In this tutorial, you will be Learning, How to display Date And Time-Picker in an activity
Here you go!!!!
Before creating an android application using Eclipse, let us see some of the key terms involved while developing this application.
Key terms involved in this project:
Pickers: Android provides controls for the user to pick a time or pick a date as ready-to-use dialogs. Each picker provides controls for selecting each part of the time (hour, minute, AM/PM) or date (month, day, year). Using these pickers help ensure that your users can pick a time or date that is valid, formatted correctly, and adjusted to the user’s locale.
** UPDATE: Android Complete tutorial now available here.
Toast: A toast provides simple feedback about an operation in a small popup. is a notification message that pops up, displays for a certain amount of time, and automtaically fades in and out. Most people just use it for debugging purpose. It only fills the amount of space required for the message and the current activity remains visible and interactive.
For example, navigating away from an email before you send it triggers a “Draft saved” toast to let you know that you can continue editing later. Toasts automatically disappear after a timeout. First, instantiate a Toast object with one of the makeText() methods. This method takes three parameters: the application Context, the text message, and the duration for the toast. It returns a properly initialized Toast object. You can display the toast notification with show().
The tutorial is about how to display date and time using pickers in the UI of the android application.
This project is developed in Eclipse 4.2 (Juno) and tested with Android 2.2
If you are new to android application project, to create a new project in Eclipse refer Creation of Android Project.
Coding:
Now let’s go to the coding section. This project requires following files.
Source Code:
- Datepicker.java – Activity (main screen)
Activity Files:
- activity_datepicker.xml – main screen/ layout
res – Values:
- strings.xml- strings available in layout/activity
Manifest file:
- AndroidManifest.xml
Here are the coding for the above files.
Datepicker.java
package com.example.datepicker; // Datepicker package for both Date and Time picker
import android.app.Activity; // Required to create an activity.
import android.os.Bundle; // A mapping from String values to various Parcelable types.
import android.view.View; // For various views/ widgets
import android.widget.Button; // Required for using button properties in activity
import android.widget.DatePicker; // Required for date picker
import android.widget.TimePicker; // Required for time picker
import android.widget.Toast; // Required for pop up notification message.
public class Datepicker extends Activity {  // all classes extends activity
    DatePicker datepicker; // object for datepicker
    int year , month , day;  // declaring variables for year, month and day
    TimePicker timepicker; // object for timepicker
        /** Called when the activity is first created. */
    @Override
    public void onCreate(Bundle savedInstanceState) { // Create a new activity
        super.onCreate(savedInstanceState);
        setContentView(R.layout.activity_datepicker); // Display datepicker activity when app starts
        datepicker = (DatePicker) findViewById(R.id.datePicker); // Obtain datepicker attributes from layout
       timepicker = (TimePicker) findViewById(R.id.timePicker); //Obtain timepicker attributes from layout
        timepicker.setIs24HourView(true);    //setting timepicker to 24 hr clock view
       Button button = (Button) findViewById(R.id.datebutton); // button to display datepicker value
        Button button1 = (Button) findViewById(R.id.timebutton);  // button to display timepicker value
// on clicking button start datepicker event
        button.setOnClickListener(new View.OnClickListener() {
            @Override
            public void onClick(View v) {
                // TODO Auto-generated method stub
// displaying datepicker value as pop up notification
                Toast.makeText(getBaseContext(), "Date : "
                + (datepicker.getMonth() + 1) +"/"+datepicker.getDayOfMonth()
                        +"/"+datepicker.getYear(), Toast.LENGTH_LONG).show();            }
        });
// On clicking button start timepicker event
        button1.setOnClickListener(new View.OnClickListener() {
        @Override
            public void onClick(View v) {
                // TODO Auto-generated method stub
// displaying timepicker value as pop up notification
            Toast.makeText(getBaseContext(),"Time Selected : "+timepicker.getCurrentHour()+":"
                    +timepicker.getCurrentMinute(), Toast.LENGTH_SHORT).show();
}
        });
    }
}
activity_datetimepicker.xml:
Menu : activity_clock.xml
AndroidManifest.xml:
strings.xml:
    Datepicker
    Hello world!

    Settings
Styles. xml:
Run the android application:
Android applications can be run on the android devices. You can either connect a hardware to the system to test the application or you can use the android virtual devices (AVD) Manager to create/manage the virtual devices running on emulator to run the application.
If you are new to create a Android Virtual Device (AVD), refer Creating Android Virtual Device.
To run the application/ project, Build your project using Project -> Build Project.
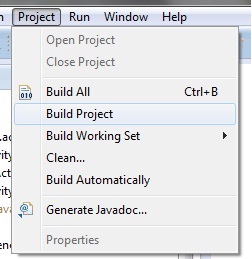
This will show errors in Console window at the bottom of the working area in case your project contains.
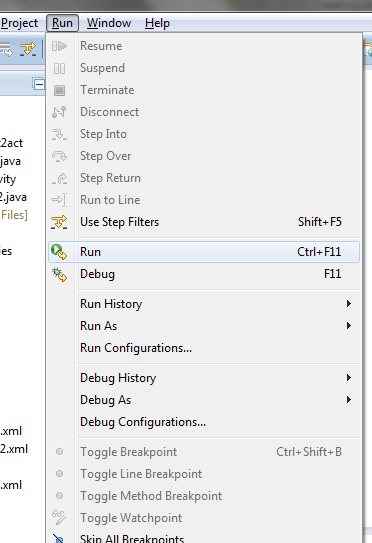
If your build is successful, Run your application using Run -> Run or Press Ctrl +F11.
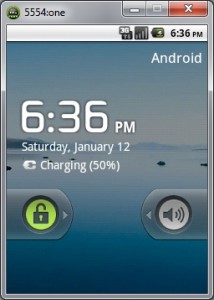
Upon running the application, the emulator will be launched with the selected/ available AVD created on your screen.

To test your application, unlock the screen and double click on your app.
You can see your app with the image set during the android project creation in AVD.
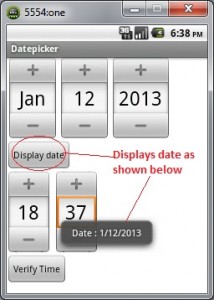
Now the activity created for datetimepicker is shown as in the figure below.
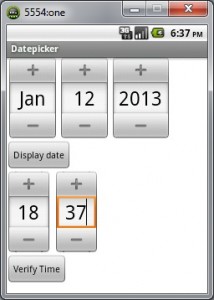
Clicking on Display date button displays pop message for datepicker.
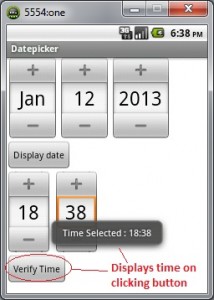
Clicking on verify time button displays pop message for timepicker.
Thus the android application project is executed successfully.
![]()
Click Here To Share This..!!
Share