Import and export your properties(SOAPUI)
Now you must be familiar about creating properties at various levels such as Project level, testsuite level, testcase level, etc.,
** Update – Complete SoapUi Tutorials now available here
Let’s see how to import and export these properties at various levels in this tutorial one by one.
IMPORT PROPERTIES
Project Level:
Step 1: Click on Project name. In the properties pane click on Custom properties or Click on Properties tab in the Overview tab of the project in the Editor window to view the defined properties as shown in the image below.
Project properties
Step 2: Click on Import property icon icon to import the properties from an external file.
Step 3: In the Load Property window, choose the property file from an external file location by clicking on Browse and click OK.
Load property dialog
Loading a property file that is not available in the project,
Loading unavailable property
Step 4: Clicking on OK will update the properties in the custom properties pane.
Import success
Property import success
TestSuite:
Step 1: Click on Testsuite name. In the properties pane click on Custom properties or Click on Properties tab in the Editor window to view the defined properties as shown in the image below.
Testsuite level property import
Step 2: Click on Import property icon icon to import the properties from an external file.
Step 3: In the Load Property window, choose the property file from an external file location by clicking on Browse and click OK.
Load property dialog
Loading a property file that is not available in the project,
Loading unavailable property
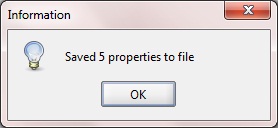
Step 4: Clicking on OK will update the properties in the custom properties pane.
Import success
TestSuite property import success
TestCase Level:
Follow the same steps discussed while importing properties in testsuites and project to import properties at testcase level as shown in the image below.
testcase prop added
TestCase property import success
EXPORT PROPERTIES
Project Level:
Step 1: Click on Project name. In the properties pane click on Custom properties or Click on Properties tab in the Overview tab of the project in the Editor window to view the defined properties as shown in the image below.
Project properties
Step 2: Clicking on Export property icon icon prompts to save the file in a location as shown in the image below.
Select export folder
Step 3: Enter a file name for the exported properties and click on Save.
Loading property
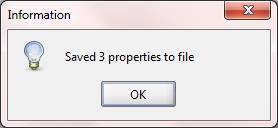
Thus properties are successfully exported.
Export project property success
Project property export success
TestSuites:
Follow the same steps discussed while exporting from project to export properties from testsuite level as shown in the image below.

TestCase:
Follow the same steps discussed while exporting from project, testsuite to export properties from testcase level as shown in the image below.

How is this done if you cannot get back into the app due to the trial running out?