Creating an android application (Activity to Activity) using Eclipse:
In this Tutorial, you will be Learning ,
1. How to create and start a new activity?
2. How to invoke an activity from an existing activity?
3. How to Manage life cycle of an activity when more than one activity interacts with each other
Here you go!!!!
Before creating an android application using Eclipse, let us see some of the key terms involved in this application.
Key terms involved in this project:
Activity: An activity provides a user interface for a single screen in your application. The window typically fills the screen, but may be smaller than the screen and float on top of other windows. An application usually consists of multiple activities that are loosely bound to each other. Each time a new activity starts, the previous activity is stopped, but the system preserves the activity in a stack (“back stack”). When a new activity starts, the previous stack is pushed onto the back stack and the new stack takes user focus.
Task: A task is a collection of activities that users interact with when performing a certain job. The activities are arranged in a stack (the “back stack”), in the order in which each activity is opened. The device Home screen is the starting place for most tasks. When the user touches an icon in the application launcher (or a shortcut on the Home screen), that application’s task comes to the foreground. If no task exists for the application (the application has not been used recently), then a new task is created and the “main” activity for that application opens as the root activity in the stack.
Back stack (Same principle as Stack): The back stack abides to the basic “last in, first out” stack mechanism, so, when the user is done with the current activity and presses the Back button, it is popped from the stack (and destroyed) and the previous activity resumes.
Fragments: A Fragment represents a behavior or a portion of user interface in an Activity. You can combine multiple fragments in a single activity to build a multi-pane UI and reuse a fragment in multiple activities. You can think of a fragment as a modular section of an activity, which has its own lifecycle, receives its own input events, and which you can add or remove while the activity is running (sort of like a “sub activity” that you can reused in different activities). A fragment must always be embedded in an activity and the fragment’s lifecycle is directly affected by the host activity’s lifecycle.
The tutorial is about managing the life cycle of an activity when more than one activity interacts with each other.
This project is developed in Eclipse 4.2 (Juno) and tested with Android 2.2
If you are new to android application project, to create a new project in Eclipse refer Creation of Android Project.
Now let’s go to the coding section.
Coding:
LifeCyc.java:
package com.simplecodestuffs.lifecycle3;
import android.app.Activity;
import android.content.Intent;
import android.os.Bundle;
import android.view.View;
import android.widget.Toast;
public class LifeCyc extends Activity { //On create will be called when the activity is first created.
@Override
public void onCreate(Bundle savedInstanceState) {
super.onCreate(savedInstanceState);
setContentView(R.layout.activity_life_cyc);
Toast.makeText(this, "A onCreate()", Toast.LENGTH_LONG).show(); //Display that Activity A is created using toast floating display
}
@Override
protected void onStart() { //Automatically called after onCreate and the activity is about to become visible.
super.onStart();
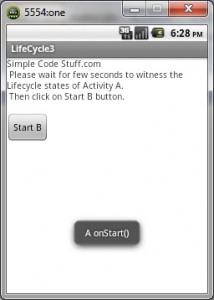
Toast.makeText(this, "A onStart()", Toast.LENGTH_LONG).show();
}
@Override
protected void onPause() { //This method is called when the system is about to put the activity into the background.
super.onPause();
Toast.makeText(this, "A onPause()", Toast.LENGTH_LONG).show();
}
@Override
protected void onResume() { //This method is called when the activity will start interacting with the user after being in a pause state. When this method is called, the activity moves to the top of the activity stack
super.onResume();
Toast.makeText(this, "A onResume()", Toast.LENGTH_LONG).show();
}
@Override
protected void onStop() { //This method is called when the activity is no longer visible to the user, because another activity has been resumed or started.
super.onStop();
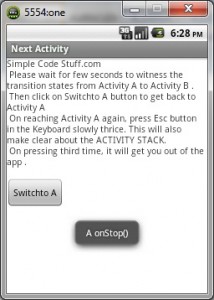
Toast.makeText(this, "A onStop()", Toast.LENGTH_LONG).show();
}
@Override
protected void onDestroy() { //This is the final method that is called on an activity before itâÂÂs destroyed.
super.onDestroy();
Toast.makeText(this, "A onDestroy()", Toast.LENGTH_LONG).show();
}
public void startNextActivity(View v) { //Function to start the next activity
Intent intent = new Intent(this, NextActivity.class); //Creating an intent to call the next activity
startActivity(intent); //To start the next activity (NextActivity.class)
}
}
NextActivity.java:
package com.simplecodestuffs.lifecycle3;
import android.app.Activity;
import android.content.Intent;
import android.os.Bundle;
import android.view.View;
import android.widget.Toast;
public class NextActivity extends Activity {
@Override
public void onCreate(Bundle savedInstanceState) {
super.onCreate(savedInstanceState);
setContentView(R.layout.activity_next);
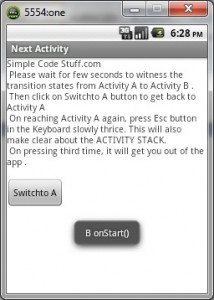
Toast.makeText(this, "B onCreate()", Toast.LENGTH_LONG).show();
}
@Override
protected void onStart() {
super.onStart();
Toast.makeText(this, "B onStart()", Toast.LENGTH_LONG).show();
}
@Override
protected void onPause() {
super.onPause();
Toast.makeText(this, "B onPause()", Toast.LENGTH_LONG).show();
}
@Override
protected void onResume() {
super.onResume();
Toast.makeText(this, "B onResume()", Toast.LENGTH_LONG).show();
}
@Override
protected void onStop() {
super.onStop();
Toast.makeText(this, "B onStop()", Toast.LENGTH_LONG).show();
}
@Override
protected void onDestroy() {
super.onDestroy();
Toast.makeText(this, "B onDestroy()", Toast.LENGTH_LONG).show();
}
public void startLifeCyc(View v) { //Function to restart the previous activity
Intent intent = new Intent(this, LifeCyc.class);
startActivity(intent); //To start the previous activity (LifeCyc.class)
}
}
activity_life_cyc.xml
<?xml version="1.0" encoding="utf-8"?>
<LinearLayout xmlns:android="http://schemas.android.com/apk/res/android"
android:orientation="vertical"
android:layout_width="fill_parent"
android:layout_height="fill_parent"
android:paddingBottom="16dip"
>
<TextView
android:layout_width="fill_parent"
android:layout_height="wrap_content"
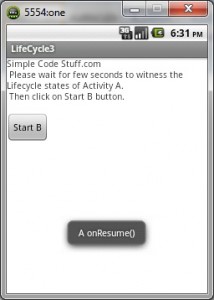
android:text="Simple Code Stuff.comn
Please wait for few seconds to witness the Lifecycle states of Activity A.n
Then click on Start B button.n"
/>
<Button
android:id="@+id/btn_start_b"
android:layout_height="wrap_content"
android:layout_width="wrap_content"
android:text="@string/btn_start_b_label"
android:onClick="startNextActivity" //On clicking the button, startNextActivity() method will be invoked.
/>
</LinearLayout>
activity_next.xml:
<?xml version="1.0" encoding="utf-8"?>
<LinearLayout xmlns:android="http://schemas.android.com/apk/res/android"
android:orientation="vertical"
android:layout_width="fill_parent"
android:layout_height="fill_parent"
>
<TextView
android:layout_width="fill_parent"
android:layout_height="wrap_content"
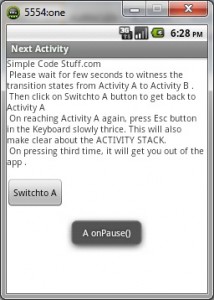
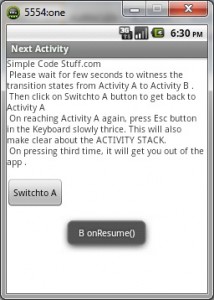
android:text="Simple Code Stuff.comn
Please wait for few seconds to witness the transition states from Activity A to Activity B .n
Then click on Switchto A button to get back to Activity A n
On reaching Activity A again, press Esc button in the Keyboard slowly thrice. This will also make clear about the ACTIVITY STACK.n
On pressing third time, it will get you out of the app .n"
/>
<Button
android:id="@+id/btn_start_a"
android:layout_height="wrap_content"
android:layout_width="wrap_content"
android:text="@string/btn_start_a_label"
android:onClick="startLifeCyc" //On clicking the button startLifeCyc() method will be invoked.
/>
</LinearLayout>
Two strings are used in the XML files
1. btn_start_a_label
2. btn_start_b_label
So give the values for these string names (Launch B and SwitchTo A) in the Res–> String folder.
[/box]
Run the android application:
Android applications can be run on the android devices. You can either connect a hardware to the system to test the application or you can use the android virtual devices (AVD) Manager to create/manage the virtual devices running on emulator to run the application.
To run the application/ project, Build your project using Project–>Build Project.
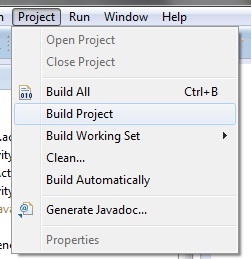
This will show errors in Console window at the bottom of the working area in case your project contains.
If your build is successful, Run your application using Run–>Run or Press Ctrl +F11.
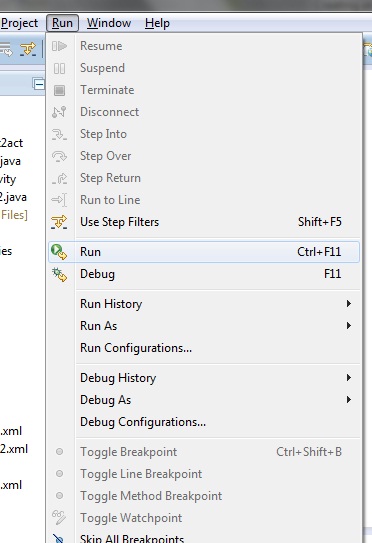
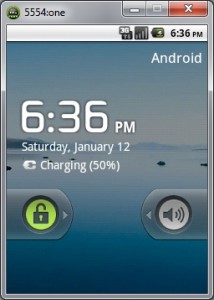
Upon running the application, the emulator will be launched which displays the AVD on your screen.
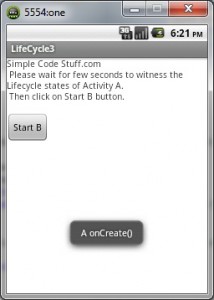

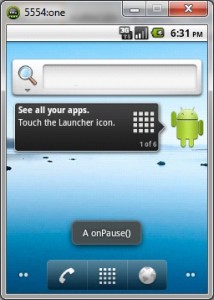
On clicking START B button:
1. A gets paused first
2. B gets started.
3. Then Activity A is stopped.

On clicking SWITCH TO A button:
1.B paused first.
2. A is started again.
3.B is then stopped.

On pressing Esc button once:
Activity A is paused and B is Resumed.
Activity B’s previous state is restored from Activity Stack.

On pressing Esc button second time:
Activity B is paused and A is Resumed.
Activity A’s initial state is restored from Activity Stack and the Activity B is destroyed.


On pressing Esc button third time:
Activity A is also destroyed and since the launcher activity is closed, the Application closes.

![]()
Click Here To Share This..!!
Share