How To Create Analog And Digital Clocks in an Android Application using Eclipse:
In this tutorial, you will be learning How to display Toggle Button in an activity
Here you go!!!!
Read MoreHow To Create Linear Layout in an Android Application using Eclipse

In this Tutorial, you will Learn
1.How to display an activity in Linear layout
2.What are the various types of linear layouts available
Before creating an android application using Eclipse, let us see some of the key terms involved while developing this application.
Key terms involved in this project:
Layout: A layout defines the visual structure for a user interface, such as the UI for an activity or app widget. You can declare a layout in two ways:
- Declare UI elements in XML
- Instantiate layout elements at runtime.
Linear Layout: Linear Layout is a view group that aligns all children in a single direction, vertically or horizontally. You can specify the layout direction with the android:orientation attribute. All children of a Linear Layout are stacked one after the other, so that a vertical list will only have one child per row, no matter how wide they are, and a horizontal list will only be one row high (the height of the tallest child, plus padding). A Linear Layout respects margins between children and the gravity (right, center, or left alignment) of each child.
** UPDATE: Android Complete tutorial now available here.
Layout Weight: Linear Layout also supports assigning a weight to individual children with the android:layout_weight attribute. This attribute assigns an “importance” value to a view in terms of how much space is should occupy on the screen. A larger weight value allows it to expand to fill any remaining space in the parent view.
The tutorial is about how to display an activity in linear layout(both horizontal and vertical).
This project is developed in Eclipse 4.2 (Juno) and tested with Android 2.2
If you are new to new to android application project, to create a new project in Eclipse refer Creation of Android Project.
Coding:
Now let’s go to the coding section. This project requires following files.
Source Code:
- Linearlayout.java (Activity in horizontal linearlayout)
- Verticallayout.java (Activity in vertical linearlayout)
Activity Files:
- activity_linearlayout.xml – horizontal linearlayout activity
- activity_verticallayout.xml – vertical linearlayout activity
res – Values:
- strings.xml – strings available in both horizontal and vertical layouts
Manifest file:
- AndroidManifest.xml - common to both horizontal and vertical layouts
Here are the coding for the above files.
Linearlayout.java:
package com.example.linearlayout; // Linearlayout package for horizontal layout
import android.os.Bundle; // A mapping from String values to various Parcelable types.
import android.app.Activity; // Required to create an activity.
import android.view.Menu; // Interface for managing the items in a menu.
public class Linearlayout extends Activity { // all classes extends activity
	@Override
	protected void onCreate(Bundle savedInstanceState) { // Create an activity/ screen
		super.onCreate(savedInstanceState);
// displays activity linearlayout in horizontal layout when app starts
		setContentView(R.layout.activity_linearlayout);
	}
	@Override
	public boolean onCreateOptionsMenu(Menu menu) { // Menu settings
		// Inflate the menu; this adds items to the action bar if it is present.
		getMenuInflater().inflate(R.menu.activity_linearlayout, menu);
		return true;
	}
}
activity_linearlayout.xml:
<?xml version="1.0" encoding="utf-8"?>
<!-Setting the linear layout with horizontal orientation-->

<LinearLayout xmlns:android="http://schemas.android.com/apk/res/android"
    android:layout_width="fill_parent"
    android:layout_height="fill_parent"
    android:orientation="horizontal" >
 <!-- Button1 -->

    <Button
        android:id="@+id/button1"
        android:layout_width="wrap_content"
        android:layout_height="wrap_content"
        android:text="Simple" />
<!-- Button2 -->

    <Button
        android:id="@+id/button2"
        android:layout_width="wrap_content"
       android:layout_height="wrap_content"
        android:text="Codestuffs" />
  <!-- Button3 -->

    <Button
        android:id="@+id/button3"
        android:layout_width="0dip"
        android:layout_height="0dip"
        android:text=".com"
        android:layout_weight="1"/>

</LinearLayout>
activity_verticallayout.xml:
<?xml version="1.0" encoding="utf-8"?>
<!-Setting the linear layout with vertical orientation-->

<LinearLayout xmlns:android="http://schemas.android.com/apk/res/android"
    android:layout_width="fill_parent"
    android:layout_height="fill_parent"
    android:orientation="vertical" >

<!-- Button1 -->

    <Button
        android:id="@+id/button1"
        android:layout_width="wrap_content"
        android:layout_height="wrap_content"
        android:text="Simple" />
<!-- Button2 -->

    <Button
        android:id="@+id/button2"
        android:layout_width="wrap_content"
       android:layout_height="wrap_content"
        android:text="Codestuffs" />
  <!-- Button3 -->

    <Button
        android:id="@+id/button3"
        android:layout_width="0dip"
        android:layout_height="0dip"
        android:text=".com"
        android:layout_weight="1"/>

</LinearLayout>
Menu : activity_linearlayout.xml
<menu xmlns:android="http://schemas.android.com/apk/res/android" >

    <item
        android:id="@+id/menu_settings"
        android:orderInCategory="100"
        android:title="@string/menu_settings"/>

</menu>
Menu : activity_verticallayout.xml
<menu xmlns:android="http://schemas.android.com/apk/res/android" >

    <item
        android:id="@+id/menu_settings2"
        android:orderInCategory="100"
        android:title="@string/menu_settings2"/>

</menu>
AndroidManifest.xml:
<?xml version="1.0" encoding="utf-8"?>
<manifest xmlns:android="http://schemas.android.com/apk/res/android"
    package="com.example.linearlayout"
    android:versionCode="1"
    android:versionName="1.0" >

    <uses-sdk
        android:minSdkVersion="8"
        android:targetSdkVersion="8" />

    <application
        android:allowBackup="true"
        android:icon="@drawable/ic_launcher"
        android:label="@string/app_name"
        android:theme="@style/AppTheme" >
        <activity
            android:name="com.example.linearlayout.Linearlayout"
            android:label="@string/app_name" >
            <intent-filter>
                <action android:name="android.intent.action.MAIN" />

                <category android:name="android.intent.category.LAUNCHER" />
            </intent-filter>
        </activity>
    </application>

     <application
        android:allowBackup="true"
        android:icon="@drawable/ic_launcher"
        android:label="@string/app_name2"
        android:theme="@style/AppTheme" >
        <activity
            android:name="com.example.linearlayout.verticallayout"
            android:label="@string/app_name2" >
            <intent-filter>
                <action android:name="android.intent.action.MAIN" />

                <category android:name="android.intent.category.LAUNCHER" />
            </intent-filter>
        </activity>
    </application>

</manifest>
strings.xml:
<?xml version="1.0" encoding="utf-8"?>
<resources>

    <! -- Application Name1 -->
    <string name="app_name">Linearlayout - Horizontal</string>
<! -- Application Name2 -->
    <string name="app_name2">Linearlayout - Vertical</string>

  <string name="menu_settings">Settings</string>
    <string name="menu_settings2">Settings</string>

</resources>
Styles. xml:
<resources>
<! -- specify properties such as height, padding, font color, font size, background color -->


    <!--
        Base application theme, dependent on API level. This theme is replaced
        by AppBaseTheme from res/values-vXX/styles.xml on newer devices.
    -->
    <style name="AppBaseTheme" parent="android:Theme.Light">
        <!--
            Theme customizations available in newer API levels can go in
            res/values-vXX/styles.xml, while customizations related to
            backward-compatibility can go here.
        -->
    </style>

    <!-- Application theme. -->
    <style name="AppTheme" parent="AppBaseTheme">
        <!-- All customizations that are NOT specific to a particular API-level can go here. -->
    </style>

</resources>
Run the android application:
Android applications can be run on the android devices. You can either connect a hardware to the system to test the application or you can use the android virtual devices (AVD) Manager to create/manage the virtual devices running on emulator to run the application.
If you are new to create a Android Virtual Device (AVD), refer Creating Android Virtual Device.
To run the application/ project, Build your project using Project ->Build Project.
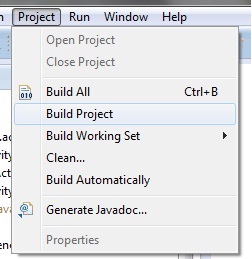
This will show errors in Console window at the bottom of the working area in case your project contains.
If your build is successful, Run your application using Run -> Run or Press Ctrl +F11.
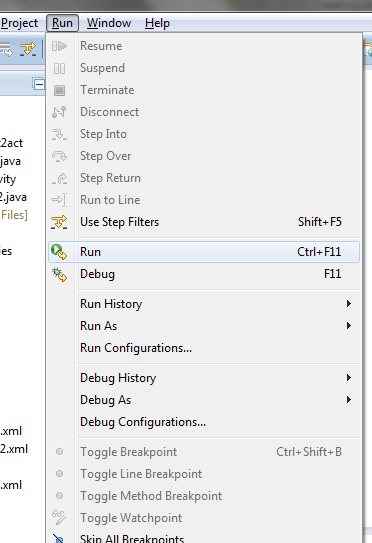
Upon running the application, the emulator will be launched which displays the AVD on your screen.
You can see your app with the image set during the android project creation in AVD.
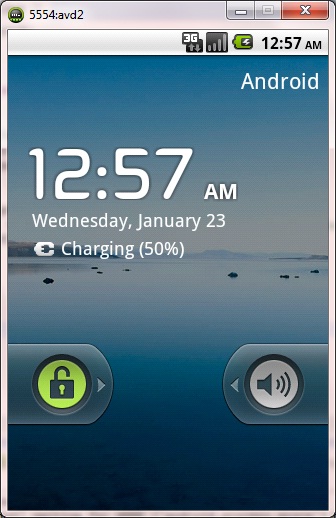
Upon running the application, the emulator will be launched with the selected/ available AVD created on your screen.

To test your application, unlock the screen and double click on your app.
You can see your app with the image set during the android project creation in AVD.
Horizontal Activity:

Vertical Layout:
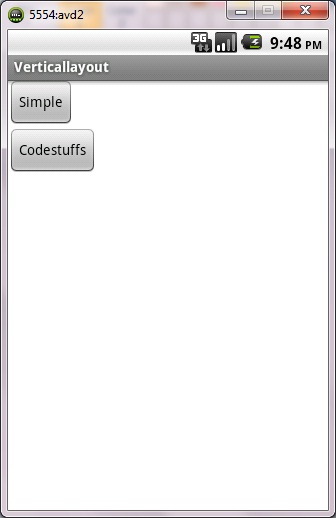
Thus the android application project is executed successfully.
Read MoreHow to get android api version programmatically
There is different ways to get that programmatically .
First method .
The SDK level (integer) the phone is running is available in:
android.os.Build.VERSION.SDK_INT;
** UPDATE: Android Complete tutorial now available here.
The enum corresponding to this int is in the android.os.Build.VERSION_CODES class.
int currentapiVersion = android.os.Build.VERSION.SDK_INT;
if (currentapiVersion < = android.os.Build.VERSION_CODES.FROYO)
{
// Do something for froyo and above versions
}
else
{
// do something for phones running an SDK before froyo
}
Read More
Installing HTC Incredible Android SDK Drivers
In order to debug on your new HTC Incredible smartphone on Windows 7, you need to install USB drivers from Google. Well, it turns out that the phone is too new for Google to have included support for the Incredible in their driver package. Here is how I got it all working though. It may or may not work for you.
1.) Install the Android SDK and download the USB drivers into a folder inside your SDK as Google tells you to do. My drivers ended up in C:\android-sdk-windows\usb_driver
2.) You next need to hack the file android_winusb.inf to add support for the HTC Incredible.
Find the section labeled [Google.NTx86]. At the end of that section, add the following lines.
; ;HTC Incredible %SingleAdbInterface% = USB_Install, USB\VID_0BB4&PID_0C9E %CompositeAdbInterface% = USB_Install, USB\VID_0BB4&PID_0C9E&MI_01
Find the section [Google.NTamd64]. At the end of that section, add the following lines.
; ;HTC Incredible %SingleAdbInterface% = USB_Install, USB\VID_0BB4&PID_0C9E %CompositeAdbInterface% = USB_Install, USB\VID_0BB4&PID_0C9E&MI_01
On your Incredible, go to Settings->Applications->Development and turn on USB debugging. NOW, you can connect your phone to the PC.
On your PC, Go to Start->Right-Click My Computer->Manage
You should see a device with a warning on it called Other->ADB. Right-click it and choose Update Driver Software… Install the drivers manually and point that to your usb_drivers folder. Ignore any warnings about unsigned drivers and everything should install just fine. After installation, I see Android Phone->Android Composite ADB Interface in the Device Manager.
After that, I went to the cmd prompt and typed
>adb devices * daemon not running. starting it now * * daemon started successfully * List of devices attached HT048HJ00425 device
Read More
How to manually upgrade an Android smart phone or tablet
We all want the most up-to-date gadgets and therefore the most recent versions of the software that is available for them. Upgrading an Android device might take you to a newer version of the operating system like 4.0 Ice Cream Sandwich or bring new features or enhancements for your smart phone or tablet.
** UPDATE: Android Complete tutorial now available here.
Upgrades for Android devices are generally available over-the-air (OTA) which avoid the need for cables and a PC. They also rolled out gradually and will depend on the manufacturer and mobile operator. You may receive a notification about an upgrade but you can also manually check and upgrade your device.
Follow the below steps to manually update an Android smart phone or tablet.
Step 1: As a precautionary measure its good practice to back up your data such as contacts and photos since the upgrade should not affect your data but there is no guarantee.
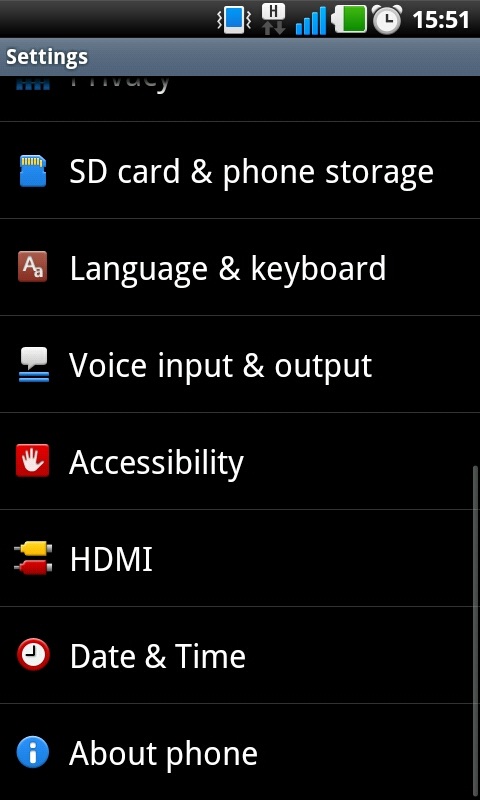
Step 2: Navigate to the Setting menu of your device. On any Android device this can be done via the app menu. Typically the Setting app will have a cog or spanner logo.
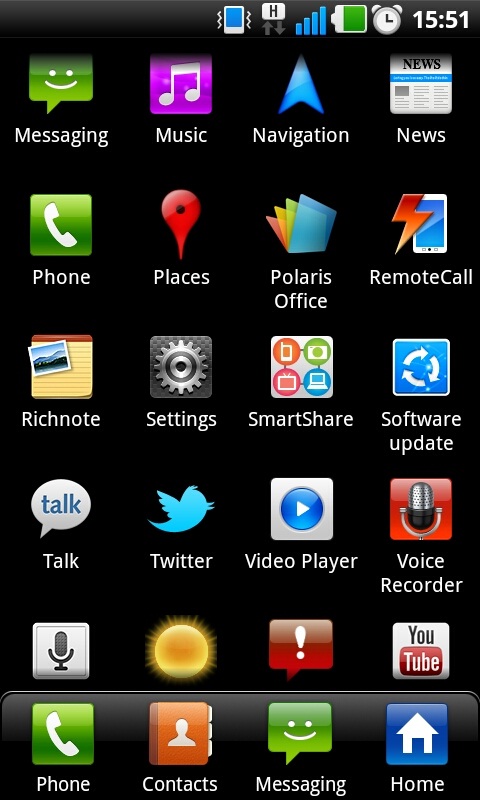
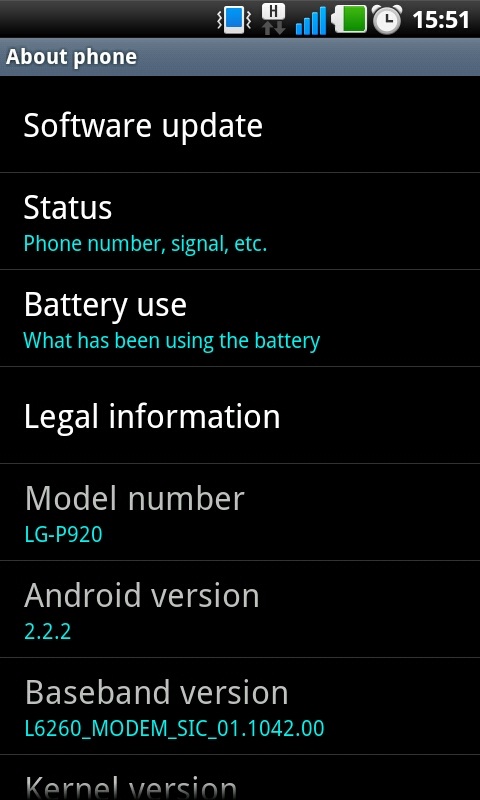
Step 3: Scroll down the Setting menu a click on ‘About Phone’ or ‘About Tablet’. This section of the menu will detail which version of Android your device is running.
Step 4: The menu can vary slightly from device to device but click the ‘Software Update’ or similar button.
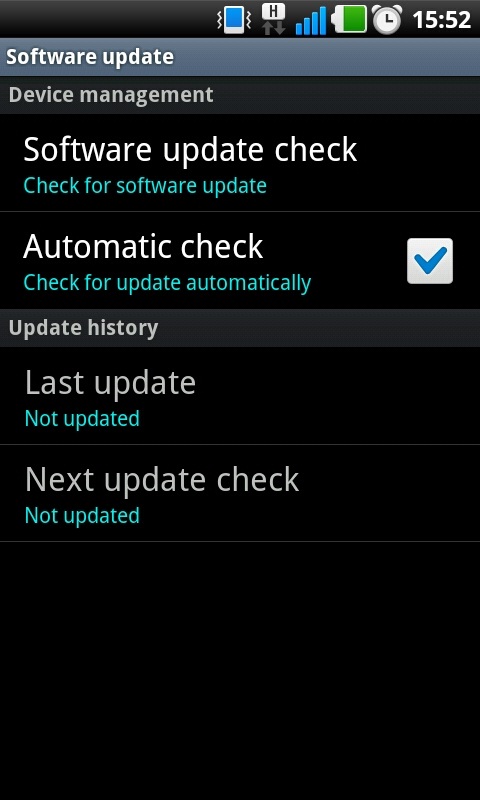
Step 5: Your phone or tablet will now search for an available update. If you are taken to another menu, select the ‘Software update check’ button or similar.
If an update is available your device then you will be asked whether you wish to install it. If you select yes then the system will download and install the new software and reboot.
Note: You device may require a Wi-Fi connection to search for an update. We also recommend downloading the software over Wi-Fi because the file size can be large.
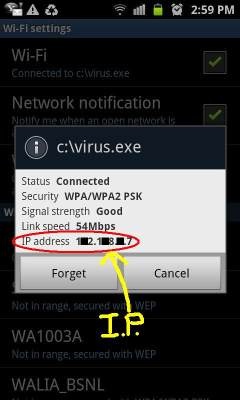
How to Find IP Address of Android SmartPhone?
You may need your android phone’s IP address for creating a media center remote, or wireless file server, there are a number of cell phone and computer applications that need your smart phone’s IP address.
There are two kinds of IP Addresses.
Internal IP address is the address of the device which is assigned by the router from which your phone is connected.
External IP address is the address of the device assigned by the ISP (Internet Service provider).
** UPDATE: Android Complete tutorial now available here.
Finding your Phone’s IP address can be real difficult job, but it’s not. Below are some of the ways you can find yours android phone’s IP.
1. From the phone
Follow Settings >> Wireless Controls >> Wi-Fi settings and tap on the network you are connected to. It’ll pop up a dialog with network status, speed, signal strength, security type and IP address.
2. From Web browser of Phone
Finding your global IP address can be done the same on all smartphone brands. Simply point your mobile phone’s web browser to . Alternative websites are CmyIP.com and touch.WhatsMyIP.org.
Below is the sample image of how it appears.