
How to configure the Android emulator to simulate the Galaxy Nexus?
What settings for the Android emulator will closely simulate the characteristics of the Galaxy Nexus as possible?
Solution:
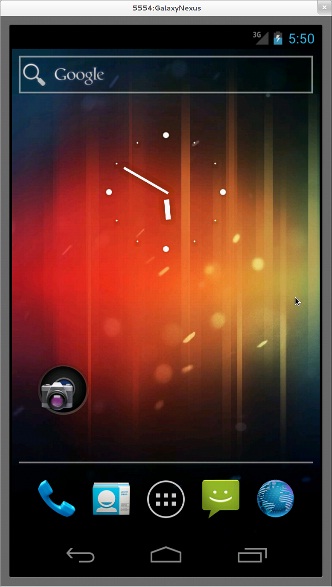
You can very well go through the procedures available below to simulate the characteristics of NEXUS,
- Target: Google APIs – API Level 15
- Skin: Built-in WXGA720
Selecting skin sets the following hardware parameters, leave them as-is:
- Hardware Back/Home: no
- Abstracted LCD density: 320
- Keyboard lid support: no
- Max VM application heap size: 48
- Device ram size: 1024
Galaxy Nexus has no SD card, just internal memory. Distinction between internal and external storage is important and can affect apps. To simulate this:
- add SD Card support=no parameter;
- launch emulator with –partition-size 1024 for 1GB internal memory, or use some other means to increase amount of internal memory available;
If you’re working on camera apps, you’ll also want to set correct number of cameras, and correct resolution.
Read More

How to create transparent activity in android
Sometimes, we need an activity to some processing but we need not necessarily have a UI.
For this, you can do just not do a setContentView() call. This will show up an activity with the default theme applied.
** UPDATE: Android Complete tutorial now available here.
But, what if you need a transparent activity? It should be showing what is behind it and still do some stuff. Just follow this post to get it done.
Add the following style In your res/values/styles.xml file (if you donât have one, create it.) Here’s a complete file:
<!--?xml version="1.0" encoding="utf-8"?-->
(the value @color/transparent is the color value #00000000 which I put in res/values/color.xml file. You can also use @android:color/transparent in later Android versions)
Then apply the style to your activity, for example:
...
Sometimes, you may need to display a dialog on this activity. Say, you are processing something and want to show the user the progress. For this, you can create a ProgressDialog and show it. But, in case of a transparent activity, it displays an outer box for the dialog.
To get rid of this, in your onCreateDialog or the place where you are initializing the dialog do the following:
@Override
protected Dialog onCreateDialog(int id) {

switch(id) {
case 100:
dialog = new ProgressDialog(this, ProgressDialog.STYLE_SPINNER);
dialog.requestWindowFeature(Window.FEATURE_NO_TITLE);
dialog.setMessage("Message");
//The below line does the trick!!
dialog.getWindow().setBackgroundDrawableResource(android.R.color.transparent);
return dialog;
}
return super.onCreateDialog(id);
}
Read More

How to make an Android Spinner with initial text Select One
There is two methods to do this. One is through XML and another is through Programmatically.
Method 1 : XML
First, you might be interested in the “prompt” attribute of the Spinner class. See the picture below, “Choose a Planet” is the prompt that can be set in the xml with android:prompt=””
I was going to suggest subclassing Spinner, where you could maintain two adapters internally. One adapter that has the “Select One” option, and the other real adapter (with the actual options), then using the OnClickListener to switch the adapters before the choices dialog is shown.. however after trying implement that idea I’ve come to the conclusion you cannot receive OnClick events for the widget itself.
You could wrap the spinner in a different view, intercept the clicks on the view, and then tell your CustomSpinner to switch the adapter, but seems like an awful hack.
** UPDATE: Android Complete tutorial now available here.
Method 2: Programtically
Here’s a general solution that overrides the Spinner view. It overrides setAdapter() to set the initial position to -1, and proxies the supplied SpinnerAdapter to display the prompt string for position<0.
/**
 * A modified Spinner that doesn't automatically select the first entry in the list.
 *
 * Shows the prompt if nothing is selected.
 *
 * Limitations: does not display prompt if the entry list is empty.
 */
public class NoDefaultSpinner extends Spinner {

    public NoDefaultSpinner(Context context) {
        super(context);
    }

    public NoDefaultSpinner(Context context, AttributeSet attrs) {
        super(context, attrs);
    }

    public NoDefaultSpinner(Context context, AttributeSet attrs, int defStyle) {
        super(context, attrs, defStyle);
    }

    @Override
    public void setAdapter(SpinnerAdapter orig ) {
        final SpinnerAdapter adapter = newProxy(orig);

        super.setAdapter(adapter);

        try {
            final Method m = AdapterView.class.getDeclaredMethod("setNextSelectedPositionInt",int.class);
            m.setAccessible(true);
            m.invoke(this,-1);

            final Method n = AdapterView.class.getDeclaredMethod("setSelectedPositionInt",int.class);
            n.setAccessible(true);
            n.invoke(this,-1);

        } catch( Exception e ) {
            throw new RuntimeException(e);
        }
    }

    protected SpinnerAdapter newProxy(SpinnerAdapter obj) {
        return (SpinnerAdapter) java.lang.reflect.Proxy.newProxyInstance(
                obj.getClass().getClassLoader(),
                new Class[]{SpinnerAdapter.class},
                new SpinnerAdapterProxy(obj));
    }

    /**
     * Intercepts getView() to display the prompt if position < 0
     */
    protected class SpinnerAdapterProxy implements InvocationHandler {

        protected SpinnerAdapter obj;
        protected Method getView;

        protected SpinnerAdapterProxy(SpinnerAdapter obj) {
            this.obj = obj;
            try {
                this.getView = SpinnerAdapter.class.getMethod("getView",int.class,View.class,ViewGroup.class);
            } catch( Exception e ) {
                throw new RuntimeException(e);
            }
        }

        public Object invoke(Object proxy, Method m, Object[] args) throws Throwable {
            try {
                return m.equals(getView) && (Integer)(args[0])
Read More
Debugging a service
Case:
You may have written/called a service for your application that may run at the background once it is created. But when you run your application you wont be able to see the services when your activity uses the services as it runs at the background and it is not visible. But once the service is completed, it will automatically get closed. So in this case, it is not possible to debug your service like it is done manually for an activity.
Solution:
Please follow the steps below in order to debug your service,
Step 1: In the first interesting method of your service (Used in create ()):
/* (non-Javadoc)
* @see android.app.Service#onCreate()
*/
@Override
public void onCreate() {
super.onCreate();
//whatever else you have to to here…
android.os.Debug.waitForDebugger(); // this line is key
}
Step 2: Set break points after the waitForDebuggerCommand.
Step 3: Launch app via debug button in Eclipse.
Step 4: Now launch adb and run the command to start a service as follows,
cd $PLATFORM_TOOLS
adb shell
am startservice -n com.google.android.apps.gtalkservice/com.google.android.gtalkservice.service.GTalkService

Re-installation failed due to different application signatures – Android Error
Cause
Mainly this error occur for same application sign.If you port your app to another device, there may be a problem with keystores. it’s called debug.keystore and located in %USER_HOME%/.android/ folder. It happens because eclipse tries to push apk with re-install key.
The digital signature is driven by a signing key that exists on the machine that signs the app. If Developer A compiles an app using the standard debug key and installs it in an emulator, then tries installing some other variation of the app — one signed with a production key, one signed with Developer B’s debug key, etc. — in the same emulator, you will get that error.
** UPDATE: Android Complete tutorial now available here.
Solution 1:
1.Share debug.keystore between various development pcs (if your project been ported to another PC)
2.Uninstall the application from your mobile if you load it already.
3.To uninstall goto settings->application->manage application.
4.Run the application again and choose the mobile
5.You can also run this command adb -d uninstall
Solution 2
Start up the emulator by running or debugging the application, do a full apk uninstall via ADB (Android Debug Bridge), and then re-install, do this by following the steps below:
1. Locate adb found in c:{android sdk location}platform-toolsadb.exe
2. Open the command prompt in this location
3. RunDebug your app in Eclipse to start the emulator and wait for the error to be outputted (now you know the device has settled and the apk-install was attempted
4. Execute the following command from the command prompt window you opened in step 2 , adb uninstall {name of your apk e.g. com.myapp}
5. Once the success message is displayed in command prompt then re-install the apk. The quickest way to re-install from this point is to open the debug perspective in Eclipse while you are still debugging from step 3 then in the Debug window right-click on the application and click Relaunch, this will re-install the APK with the correct key.
Solution 3
Share a single debug.keystore across multiple computer
Copy the default debug.keystore from the one machine to the other machine(s) into a known location.
To get the location of the default debug.keystore:
1. Open Eclipse click window->preferences
2. Go to android->build the location in the Default debug keystore textbox
3. Once you have shared/copied the debug.keystore onto the various computers update the eclipse setting Custom debug keystore to point to this debug.keystore .