
How To Create Progress Bar in an Android Application using Eclipse:

In this tutorial, you will be Learning, How to display Progress Bar in an activity
Here you go!!!!
Before creating an android application using Eclipse, let us see some of the key terms involved while developing this application.
Key terms involved in this project:
Intent: Android uses a special class called Intent to move from screen to screen. Intent describe what an application wants done. The two most important parts of the intent data structure are the action and the data to act upon. Typical values for action are MAIN (the front door of the application), VIEW, PICK, EDIT, etc. The data is expressed as a Uniform Resource Indicator (URI). For example, to view a website in the browser, you would create Intent with the VIEW action and the data set to a Website-URI.
** UPDATE: Android Complete tutorial now available here.
View: It’s a data structure whose properties store the layout and content for a specific rectangular area of the screen. A View object handles measuring, its layout, drawing, focus changes, scrolling, and key/gestures for the screen area it represents. The View class serves as a base class for all widgets. The list of widgets available includes i.e. TextView, EditText, Button, RadioButton, Checkbox, ScrollView, etc.,
Button: A button consists of text or an icon (or both text and an icon) that communicates what action occurs when the user touches it. When the user clicks a button, the Button object receives an on-click event. To define the click event handler for a button, add the android:onClick attribute to the <Button> element in your XML layout.
Progress bar: Progress bar is used to display the progress or the status of any activity such as file download, loading of a web page, etc., A progress bar could be created using the Android ProgressBar class but the simplest approach for a generic implementation is to use the ProgressDialog class, which subclasses AlertDialog and has methods to open and manage a dialog window with a progress bar embedded in it that floats over the dimmed original window. There are two basic types of progress bars that we can implement using the ProgressDialog class:
- A horizontal bar that fills to show a quantitative amount of progress. This style of progress bar is specified by the class constant ProgressDialog.STYLE_HORIZONTAL.
- A spinning symbol that indicates progress but of an indeterminate amount. This style of progress bar is specified by the class constant ProgressDialog.STYLE_SPINNER.
The tutorial is about how to display progress bar (horizontal) in the UI of the android application.
This project is developed in Eclipse 4.2 (Juno) and tested with Android 2.2
If you are new to new to android application project, to create a new project in Eclipse refer Creation of Android Project.
Coding:
Now let’s go to the coding section. This project requires following files.
Source Code:
- Progressbar.java- Activity (main screen)
Activity Files:
- activity_progressbar.xml – main screen/ layout
res – Values:
- strings.xml- strings available in layout/activity
Manifest file:
- AndroidManifest.xml
Here are the coding for the above files.
Progressbar.java:
package com.example.progressbar; // Progress bar package
import android.app.Activity; // Required to create an activity
import android.app.ProgressDialog; // for progress indicator and an optional text message
import android.os.Bundle; // A mapping from String values to various Parcelable types.
import android.os.Handler; // send and process message and runnable objects associated with threads
import android.widget.Button; // Required for using button properties in activity
import android.view.View; // For various views/ widgets
import android.view.View.OnClickListener;
 public class Progressbar extends Activity { // all classes should extend activity
 	Button StartProgress; // object for button class
	ProgressDialog progressBar; // object for progressdialog class
	private int progressBarStatus = 0; // setting progress bar to zero
	private Handler progressBarHandler = new Handler(); // object for handler class
 	private long progress = 0;
 	@Override
	public void onCreate(Bundle savedInstanceState) { // create a new activity
		super.onCreate(savedInstanceState);
		setContentView(R.layout.activity_progressbar); // display progressbar activity when app starts
 		addListenerOnButton();
 }
 	public void addListenerOnButton() {
// retrieving properties of button from activity
 		StartProgress = (Button) findViewById(R.id.progressbutton);
//Click on button to start progress bar
		StartProgress.setOnClickListener(
                 new OnClickListener() {
 		   @Override
		   public void onClick(View v) {
 			// prepare for a progress bar dialog
			progressBar = new ProgressDialog(v.getContext()); //
			progressBar.setCancelable(true);
			progressBar.setMessage("Starting Progress!!!"); // set message in progressbar dialog
//horizontal progress bar type of progress bar
			progressBar.setProgressStyle(ProgressDialog.STYLE_HORIZONTAL);
			progressBar.setProgress(0); //set min value of progress bar
			progressBar.setMax(100); // set max value of progress bar
			progressBar.show(); // display progress bar
 			//reset progress bar status
			progressBarStatus = 0;
 			//reset progress
			progress = 0;
 			new Thread(new Runnable() {
			  public void run() {
				while (progressBarStatus < 100) {
 				  // process some tasks
				  progressBarStatus = doSomeTasks();
 				  // your computer is too fast, sleep 1 second
				  try {
					Thread.sleep(1000);
				  } catch (InterruptedException e) {
					e.printStackTrace();
				  }
 				  // Update the progress bar
				  progressBarHandler.post(new Runnable() {
					public void run() {
					  progressBar.setProgress(progressBarStatus);
					}
				  });
				}

				// Progress completed ?!?!,
				if (progressBarStatus >= 100) {
					// sleep 2000 milliseconds, so that you can see the 100%
					try {
						Thread.sleep(2000);
					} catch (InterruptedException e) {
						e.printStackTrace();
					}
					// close the progress bar dialog
					progressBar.dismiss();
				}
			  }
		       }).start();
	           }
                });
        }

	// Progress bar simulator...
	public int doSomeTasks() {
		while (progress <= 1000000) {
			progress++;
			if (progress == 100000) {
				return 10;
			} else if (progress == 200000) {
				return 20;
			} else if (progress == 300000) {
				return 30;
			}
		}
 		return 100;
 	}
 }
Activity_progressbar.xml:
<?xml version="1.0" encoding="utf-8"?>

<!-Setting the linear layout with vertical orientation-->

<LinearLayout xmlns:android="http://schemas.android.com/apk/res/android"
    android:layout_width="fill_parent"
    android:layout_height="fill_parent"
    android:orientation="vertical" >

<!--Create a button to start progress bar-->

    <Button
        android:id="@+id/progressbutton"
        android:layout_width="wrap_content"
        android:layout_height="wrap_content"
        android:text="Click to See Progress!!!" />

</LinearLayout>
Menu : activity_progressbar.xml:
<menu xmlns:android="http://schemas.android.com/apk/res/android"></menu>
AndroidManifest.xml:
<?xml version="1.0" encoding="utf-8"?>
<manifest xmlns:android="http://schemas.android.com/apk/res/android"
    package="com.example.progressbar"
    android:versionCode="1"
    android:versionName="1.0" >

    <uses-sdk
        android:minSdkVersion="8"
        android:targetSdkVersion="8" />

    <application
        android:allowBackup="true"
        android:icon="@drawable/ic_launcher"
        android:label="@string/app_name"
        android:theme="@style/AppTheme" >
        <activity
            android:name="com.example.progressbar.Progressbar"
            android:label="@string/app_name" >
            <intent-filter>
                <action android:name="android.intent.action.MAIN" />

                <category android:name="android.intent.category.LAUNCHER" />
            </intent-filter>
        </activity>
    </application>

</manifest>
strings.xml:
<?xml version="1.0" encoding="utf-8"?>
<resources>

<!--Application Name-->

    <string name="app_name">Progressbar</string>


</resources>
Styles. xml:
<!-- specify properties such as height, padding, font color, font size, background color -->
<resources>

    <!--
        Base application theme, dependent on API level. This theme is replaced
        by AppBaseTheme from res/values-vXX/styles.xml on newer devices.
    -->
    <style name="AppBaseTheme" parent="android:Theme.Light">
        <!--
            Theme customizations available in newer API levels can go in
            res/values-vXX/styles.xml, while customizations related to
            backward-compatibility can go here.
        -->
    </style>

    <!-- Application theme. -->
    <style name="AppTheme" parent="AppBaseTheme">
        <!-- All customizations that are NOT specific to a particular API-level can go here. -->
    </style>

</resources>
Run the android application:
Android applications can be run on the android devices. You can either connect a hardware to the system to test the application or you can use the android virtual devices (AVD) Manager to create/manage the virtual devices running on emulator to run the application.
If you are new to create a Android Virtual Device (AVD), refer Creating Android Virtual Device.
To run the application/ project, Build your project using Project -> Build Project.
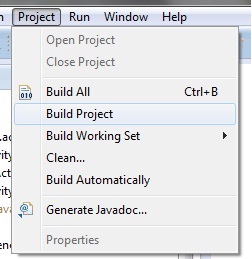
This will show errors in Console window at the bottom of the working area in case your project contains.
If your build is successful, Run your application using Run -> Run or Press Ctrl +F11.
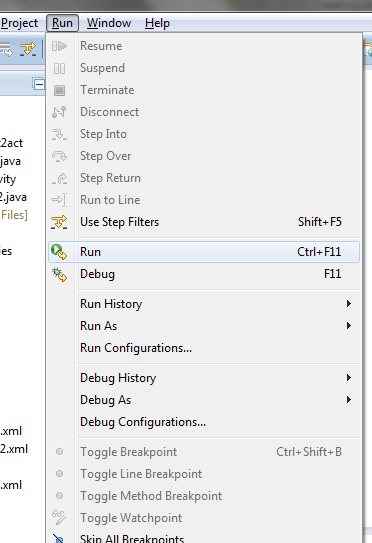
Upon running the application, the emulator will be launched which displays the AVD on your screen.
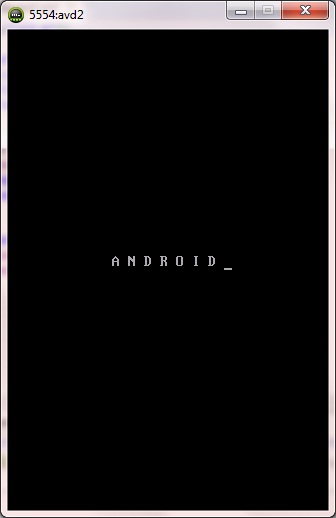
To test your application, unlock the screen and double click on your app.
You can see your app with the image set during the android project creation in AVD.

Now the application runs and the activity progress bar appears as shown below.

Clicking on button displays the progress bar.


Thus the android application project is developed successfully.

Click Here To Share This..!!
Share