SQL Injection How to Test Web Applications against SQL Injection Attacks???
Many applications use some type of a database. An application under test might have a user interface that accepts user input that is used to perform the following tasks:
1.Show the relevant stored data to the user e.g. the application checks the credentials of the user using the log in information entered by the user and exposes only the relevant functionality and data to the user
2.Save the data entered by the user to the database e.g. once the user fills up a form and submits it, the application proceeds to save the data to the database; this data is then made available to the user in the same session as well as in subsequent sessions.
Some of the user inputs might be used in framing SQL statements that are then executed by the application on the database. It is possible for an application NOT to handle the inputs given by the user properly. If this is the case, a malicious user could provide unexpected inputs to the application that are then used to frame and execute SQL statements on the database. This is called SQL injection. The consequences of such an action could be alarming.
The following things might result from SQL injection:
- The user could log in to the application as another user, even as an administrator.
- The user could view private information belonging to other users e.g. details of other users profiles, their transaction details etc.
- The user could change application configuration information and the data of the other users.
- The user could modify the structure of the database; even delete tables in the application database.
- The user could take control of the database server and execute commands on it at will.
Since the consequences of allowing the SQL injection technique could be severe, it follows that SQL injection should be tested during the security testing of an application. Now, let us see some of the practical examples of SQL injection.
Important: The SQL injection problem should be tested only in the test environment.
Scenario/Case study:
If the application has a log in page, it is possible that the application uses a dynamic SQL such as statement below. This statement is expected to return at least a single row with the user details from the Users table as the result set when there is a row with the user name and password entered in the SQL statement.
SELECT * FROM Users WHERE User_Name = 'strUserName' AND Password = 'strPassword';
If the tester would enter John as the strUserName (in the textbox for user name) and Smith as strPassword (in the textbox for password), the above SQL statement would become:
SELECT * FROM Users WHERE User_Name = 'John' AND Password = 'Smith';
Note: Part of the SQL statement after John is turned into a comment. If there were any user with the user name of John in the Users table, the application could allow the tester to log in as the user John. The tester could now view the private information of the user John.
What if the tester does not know the name of any existing user of the application? In such a case, the tester could try common user names like admin, administrator and sysadmin. If none of these users exist in the database, the tester could enter John or x=x as strUserName and Smith or x=x as strPassword. This would cause the SQL statement to become like the one below.
SELECT * FROM Users WHERE User_Name = 'John'
   or x = 'x' AND Password = 'Smith' or x = 'x';
Since x=x condition is always true, the result set would consist of all the rows in the Users table. The application could allow the tester to log in as the first user in the Users table.
Important: The tester should request the database administrator or the developer to copy the table in question before attempting the following SQL injection.
If the tester would enter John; DROP table users_details;as strUserName and anything as strPassword, the SQL statement would become like the one below.
SELECT * FROM Users WHERE User_Name = 'John';
 DROP table users_details; AND Password = 'Smith'
This statement could cause the table users_details to be permanently deleted from the database.
Though the above examples deal with using the SQL injection technique only the log in page, the tester should test this technique on all the pages of the application that accept user input in textual format e.g. search pages, feedback pages etc.
Thus, SQL injection might be possible in applications that use SSL. Even a firewall might not be able to protect the application against the SQL injection technique.
Read More
Running functional tests from the command-line
Running functional tests from the command-line is straightforward and simple using the included testrunner.bat/.sh script, which takes a number of arguments to control which tests to run, output, etc:
- e : The endpoint to use when invoking test-requests, overrides the endpoint set in the project file
- h : The host:port to use when invoking test-requests, overrides only the host part of the endpoint set in the project file
- s : The TestSuite to run, used to narrow down the tests to run
- c : The TestCase to run, used to narrow down the tests to run
- u : The username to use in any authentications, overrides any username set for any TestRequests
- p : The password to use in any authentications, overrides any password set for any TestRequests
- w : Sets the WSS password type, either ‘Text’ or ‘Digest’
- d : The domain to use in any authentications, overrides any domain set for any TestRequests
- r : Turns on printing of a small summary report (see below)
- f : Specifies the root folder to which test results should be exported (see below)
- j : Turns on exporting of JUnit-compatible reports, see below
- a : Turns on exporting of all test results, not only errors
- : Opens the generated report in a browser (SoapUI Pro only)
- i : Enables SoapUI UI-related components, required if you use the UISupport class for prompting or displaying information
- t : Sets the soapui-settings.xml file to use, required if you have custom proxy, ssl, http, etc setting
- x : Sets project password for decryption if project is encrypted
- v : Sets password for soapui-settings.xml file
- D : Sets system property with name=value
- G : Sets global property with name=value
- P : Sets project property with name=value, e.g. -Pendpoint=Value1 -PsomeOtherProperty=value2
- S : Sets to save the project file after tests have been run
- I : Do not stop if error occurs, ignore them
- R : Selects which report to generate for the test objects executed, for example if running the entire project, this could specify the name of a test-suite-level report that would be generated for each TestSuite. The report is saved as specified with the -F option to the folder specified with the -f option. (SoapUI Pro only)
- F : Sets the format of the report specified with the -R option, for Printable reports this is one of PDF, XLS, HTML, RTF, CSV, TXT, and XML. For Data Export this is either XML or CSV (SoapUI Pro only)
- g : Sets the output to include Coverage HTML reports ( SoapUI Pro only )
- E : Sets which environment to use (SoapUI Pro only)
Launching the TestRunner from within SoapUI
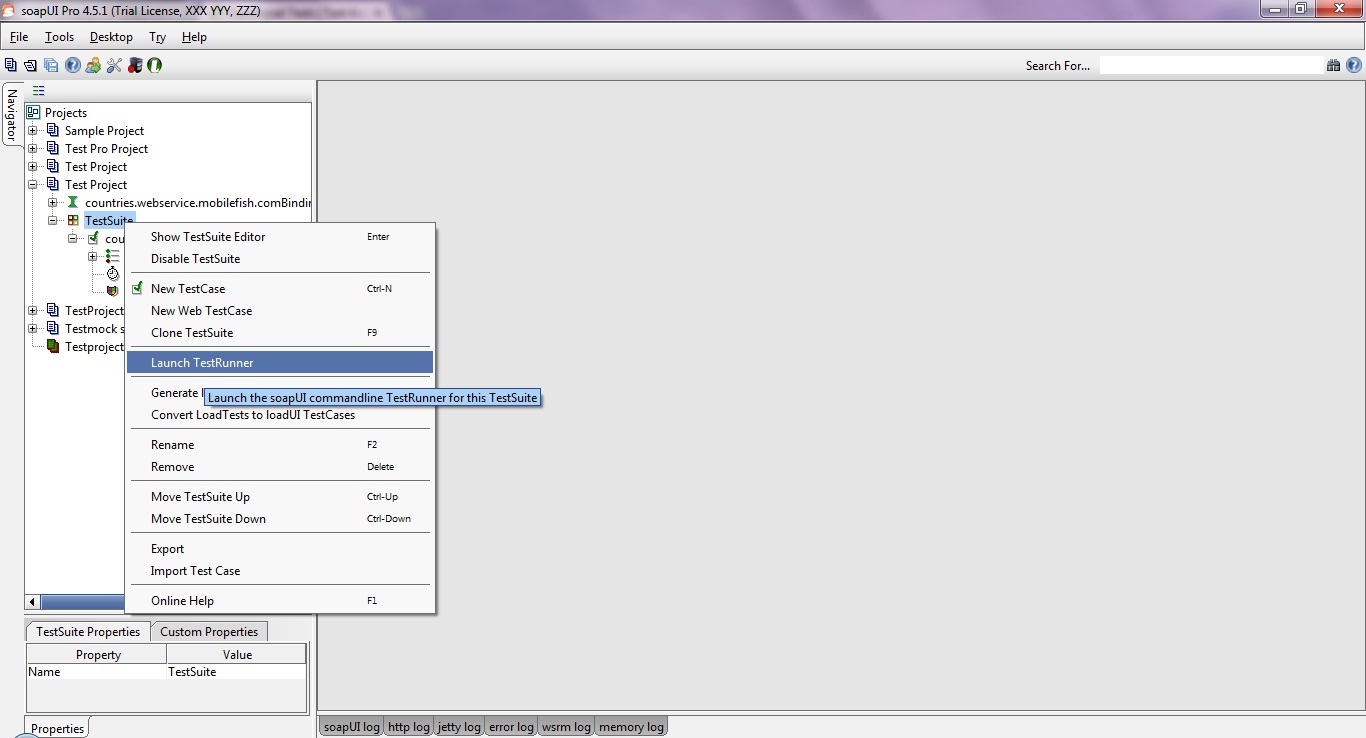
Before getting started, with the command line testrunner, SoapUI includes a “Launch TestRunner” action available from Project, TestSuite or TestCase popup menus, which launches the bundled command-line tools from inside SoapUI.
The IDE plugins do not include these runners, you will need to download/install SoapUI seperately and point the “TestRunner Path” option in this dialog to the install directory).
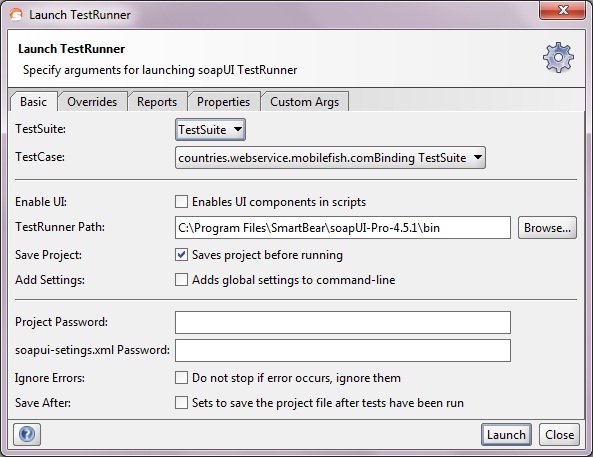
The dialog looks as follows:
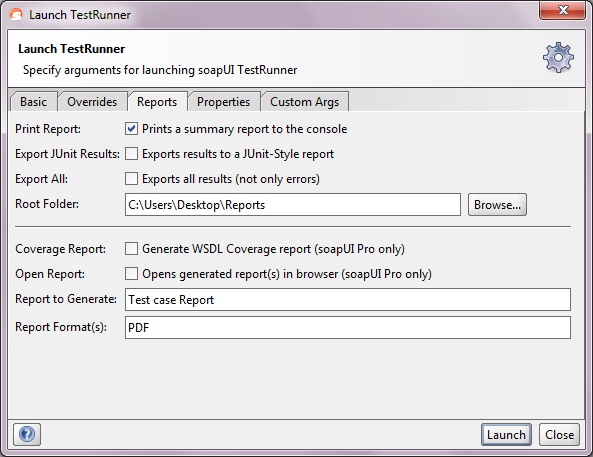
Here we’ve specified some initial settings to run the current TestCase, in the Report tab we can specify which reports to generate:
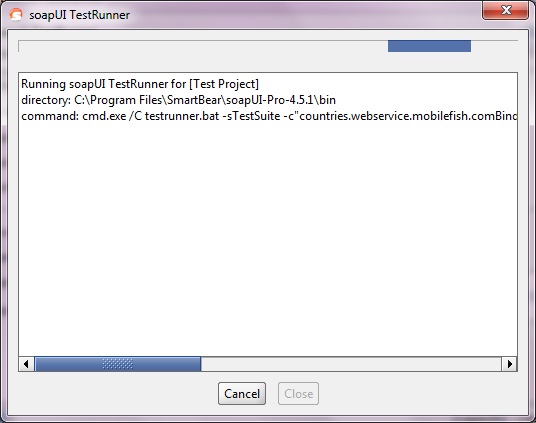
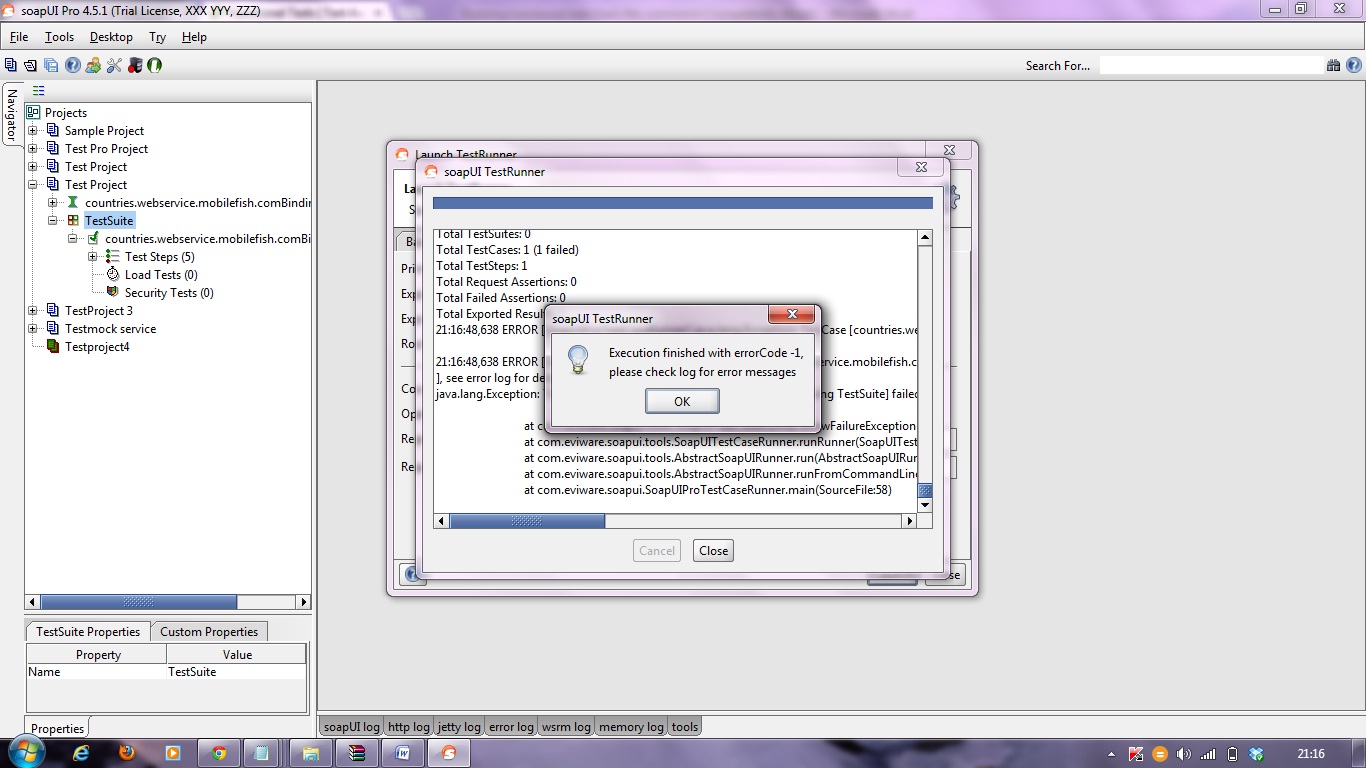
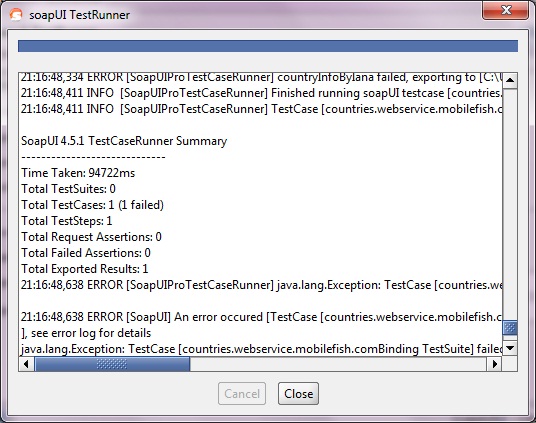
Now if we run the testrunner we get:
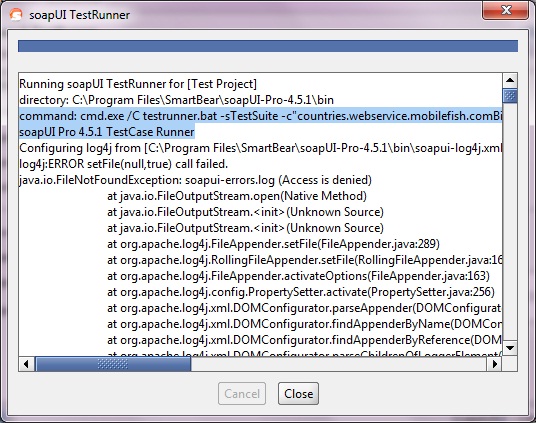
Scrolling back up in the opened window we can see the actual command issued at the command-line:
Copy and paste the below highlighted into your favorite automation tool for rerun these tests as configured.
That is all!!! ;)
Read More
How to manually upgrade an Android smart phone or tablet
We all want the most up-to-date gadgets and therefore the most recent versions of the software that is available for them. Upgrading an Android device might take you to a newer version of the operating system like 4.0 Ice Cream Sandwich or bring new features or enhancements for your smart phone or tablet.
** UPDATE: Android Complete tutorial now available here.
Upgrades for Android devices are generally available over-the-air (OTA) which avoid the need for cables and a PC. They also rolled out gradually and will depend on the manufacturer and mobile operator. You may receive a notification about an upgrade but you can also manually check and upgrade your device.
Follow the below steps to manually update an Android smart phone or tablet.
Step 1: As a precautionary measure its good practice to back up your data such as contacts and photos since the upgrade should not affect your data but there is no guarantee.
Step 2: Navigate to the Setting menu of your device. On any Android device this can be done via the app menu. Typically the Setting app will have a cog or spanner logo.
Step 3: Scroll down the Setting menu a click on ‘About Phone’ or ‘About Tablet’. This section of the menu will detail which version of Android your device is running.
Step 4: The menu can vary slightly from device to device but click the ‘Software Update’ or similar button.
Step 5: Your phone or tablet will now search for an available update. If you are taken to another menu, select the ‘Software update check’ button or similar.
If an update is available your device then you will be asked whether you wish to install it. If you select yes then the system will download and install the new software and reboot.
Note: You device may require a Wi-Fi connection to search for an update. We also recommend downloading the software over Wi-Fi because the file size can be large.
How to Find IP Address of Android SmartPhone?
You may need your android phone’s IP address for creating a media center remote, or wireless file server, there are a number of cell phone and computer applications that need your smart phone’s IP address.
There are two kinds of IP Addresses.
Internal IP address is the address of the device which is assigned by the router from which your phone is connected.
External IP address is the address of the device assigned by the ISP (Internet Service provider).
** UPDATE: Android Complete tutorial now available here.
Finding your Phone’s IP address can be real difficult job, but it’s not. Below are some of the ways you can find yours android phone’s IP.
1. From the phone
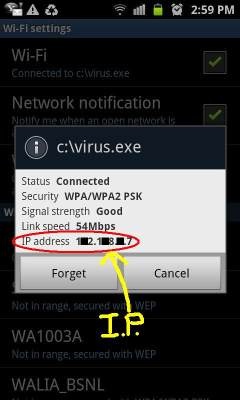
Follow Settings >> Wireless Controls >> Wi-Fi settings and tap on the network you are connected to. It’ll pop up a dialog with network status, speed, signal strength, security type and IP address.
2. From Web browser of Phone
Finding your global IP address can be done the same on all smartphone brands. Simply point your mobile phone’s web browser to . Alternative websites are CmyIP.com and touch.WhatsMyIP.org.
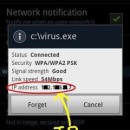
Below is the sample image of how it appears.
Read MoreHow to configure the Android emulator to simulate the Galaxy Nexus?
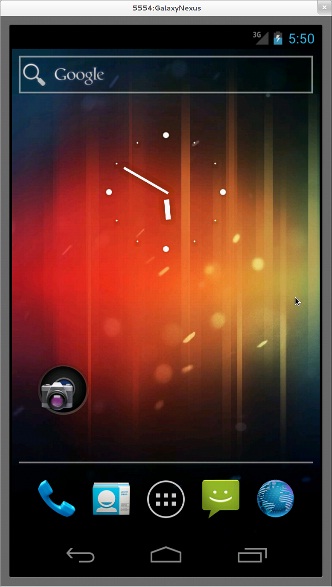
What settings for the Android emulator will closely simulate the characteristics of the Galaxy Nexus as possible?
Solution:
You can very well go through the procedures available below to simulate the characteristics of NEXUS,
- Target: Google APIs – API Level 15
- Skin: Built-in WXGA720
Selecting skin sets the following hardware parameters, leave them as-is:
- Hardware Back/Home: no
- Abstracted LCD density: 320
- Keyboard lid support: no
- Max VM application heap size: 48
- Device ram size: 1024
Galaxy Nexus has no SD card, just internal memory. Distinction between internal and external storage is important and can affect apps. To simulate this:
- add SD Card support=no parameter;
- launch emulator with -partition-size 1024 for 1GB internal memory, or use some other means to increase amount of internal memory available;
If you’re working on camera apps, you’ll also want to set correct number of cameras, and correct resolution.
Read More


