Spring – Java config file providing the configuration metadata
![]()

In the previous example, we observed the working of spring at its simplest . The main part of injecting the dependency value here, was taken up by the Configuration metadata xml file (Beans.xml). Another option supported by spring is to set this information through a java configuration file.
** UPDATE: Spring Complete tutorial now available here.
1 Create the POJO HelloWorld.java
File : HelloWorld.java
package com.simpleCodeStuffs;

public class HelloWorld {

public HelloWorld(){

System.out.println("In constructor of HelloWorld");

}

private String message;

public void setMessage(String message){

this.message  = message;

}

public void getMessage(){

System.out.println("Your Message : " + message);

}

}
Step 2 :
Previously, the metadata was provided through xml (Beans.xml)using various xml tags. Now let us define the java configuration equivalent of the same which makes use of annotations to provide the configuration data. Create a new class JavaConfig under the same package.
File :JavaConfig.java
package com.simpleCodeStuffs;

import org.springframework.context.annotation.Bean;

import org.springframework.context.annotation.Configuration;

@Configuration

public class JavaConfig {

@Bean(name="helloWorld")

public HelloWorld helloWorld(){

HelloWorld bean = new HelloWorld();

System.out.println("helloWorld bean through Java Config");

bean.setMessage("JavaConfig msg- SimpleCodeStuffs");

return bean;

}

}
| Annotation | Description |
| @Configuration | States that this class is used by Spring to provide bean definition. An application may have one or more classes with @Configuration |
| @Beanattributes :- a) Name b) initMethodName c) destroyMethodName d) Scope | It is a method level annotation. The return value of the methods annotated with @Bean is registered as a bean by BeanFactory.a) This is used to explicitly mention the name of the bean. By default the bean name is same as the method name.b) The method to be called for the bean initialization c) The method to be called at the end of the bean lifecycle. d) Defines the scope of bean. By default it is taken as âsingletonâ.
|
| @import | The functionality is similar to <import resource=â..â/> in xml file. |
This can be done as follows
File : JavaConfig.java
@Configuration

public class JavaConfig {

@Bean

public Candidate candidate() {

return new Candidate(address());

}

@Bean

public Address address() {

return new Address ();

}

}
In this case, Address is an attribute inside Candidate. Hence the value for the Address bean is injected by passing a call to address() bean method from Candidate’s bean method.
3. Create a main class for running the above example
File : MainJavaConfig.java
package com.simpleCodeStuffs;

import org.springframework.context.ApplicationContext;

import org.springframework.context.annotation.AnnotationConfigApplicationContext;

public class MainJavaConfig {

public static void main(String args[]){

ApplicationContext context =
           new AnnotationConfigApplicationContext(JavaConfig.class);

HelloWorld obj = (HelloWorld) context.getBean("helloWorld");

obj.getMessage();

}

}
4 : Demo
Run the Main class. The output is as follows

Spring Environment Setup

In this section, you will see about setting up Eclipse IDE to get started with our code development works, installing the latest JDK a, setting the environment variables and adding the required JARs for running of some basic Spring based applications.
Step 1. Download and install Eclipse IDE of your preference. For Eclipse IDE installation instructions, you can refer here.
eclipse IDE installation instructions
Step 2. Download the latest JDK, as per your system requirements from here
Step 3. Set the environment variables in your system
Right click on MyComputer -> Properties. On the left side pane, choose Advanced System Settings.
** UPDATE: Spring Complete tutorial now available here.

A window opens up. Choose Advanced tab on this and click on Environment Variables button

Environment Variable window opens up. In the system variables, select New.

Provide the variable name – JdkHome(this name can differ)
variable value – C:Program FilesJavajdk1.7.0_11bin . The provided location is the path where the bin folder under JDK is present.
Click ok

Now your eclipse is well set.
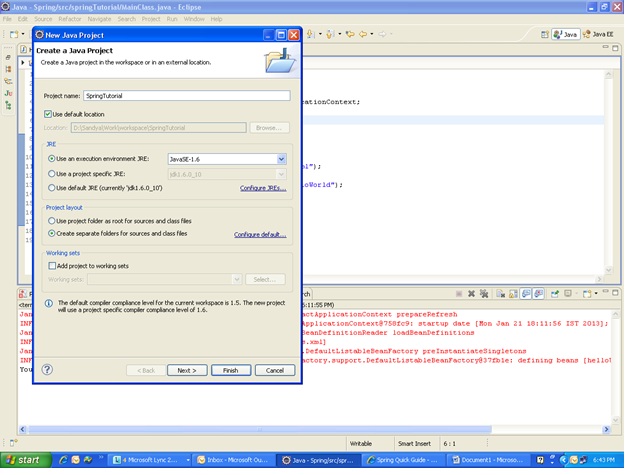
Step 4 : Now that your Integrated Development Environment(IDE) is ready. Let us create a project.
Select File ->New->Java project
Provide an appropriate name.
Step 5 : Download the required JAR files. Find below the list of JAR files that will be made use of, over various stages of this tutorial.
Spring Basic jars
- antlr-runtime-3.0.1
- org.springframework.aop-3.1.0.M2
- org.springframework.asm-3.1.0.M2
- org.springframework.aspects-3.1.0.M2
- org.springframework.beans-3.1.0.M2
- org.springframework.context.support-3.1.0.M2
- org.springframework.context-3.1.0.M2
- org.springframework.core-3.1.0.M2
- org.springframework.expression-3.1.0.M2
- commons-logging-1.1.1
- cglib-2.2
- aopalliance
- asm-3.3.1
- aspectjweaver
Step 6 : Right click on your project. Select Build path->Configure Build path.

On the libraries tab, choose Add external libraries. Here browse and add the list of JARs downloaded as per the previous step. Click ok

Thats it! You are now all set to start trying out hands-on exercises using spring !! Read More
Spring Inversion Of Control
One of the core concepts in Spring is Inversion Of Control(IOC). It makes use of BeanFactory to manage Java objects from instantiation to destruction. The IOC implements Dependency Injection, thereby facilitating loose coupling between components(POJOs). When it comes to large codes, one of the main problems at hand would be the dependencies between the various classes. Typically high level modules depend on low level modules for their values/functionalities. Here, whenever a change is required we have to face the problem of
- Rigidity : Changing one part of code might affect other parts of the code
- Fragility : One change might lead to unexpected changes from other parts
- Immobility : Reuse of the code is impossible because the application is so much tangled already.
Spring uses Dependency Injection[DI] as a rescue for this problem. The underlying classes are made abstract and the instantiation, management and class casting of the objects are done by the spring framework’s IOC container.

It is clear from the above pictorical representation, Spring container acts as a bridge between the abstract POJO classes which contains the blue print of the required model and the metadata which provides data for the POJO classes. This way, there is no dependency for classes on one another. Making the programming abstract through dependency injection is the solution for handling the above stated problems which are mainly associated with development, enhancement and maintenance of large codes.
Read More
Spring Tutorial for Java Beginners
![]()
The Spring Framework is a lightweight framework for developing Java enterprise applications. It provides high performing, easily testable and reusable code. Spring handles the infrastructure as the underlying framework so that you can focus on your application.Spring is modular in design, thereby making creation, handling and linking of individual components so much easier. Spring implements Model View Container(MVC) design pattern.
In this tutorial, we’ll take you step by step towards mastering the spring concepts.
Here you go!!!! :)
Spring Basics
1. Spring framework architecture
Gives you an insight of the architectural framework of Spring.
This link provides any beginner, a start up at the basic concepts of Spring.
The IOC container is at the core of Spring framework. Read on to understand why this was needed and how it functions.
Basic tutorials with spring
1. Spring set up
Eclipse IDE set up and start up configurations for Spring support.
Your first attempt at creating and running spring program at its simplest.
3. JavaConfig to provide Spring metadata
The configuration metadata can also be provided using a JavaConfig file. Click on to see more.
Dependency Injection(DI)
1. Dependency Injection(DI) in spring
What exactly is Dependency Injection and why is it needed? What are the types of DI supported by Spring.
2. Basic example of Setter injection in spring
Basic example of setting values to attributes (of primitive Data Types to a class through the bean using setter injection
3. Basic example of Constructor injection in spring
Basic example of setting values to attributes (of primitive Data Types to a class through the bean using constructor injection
4. Setter injection for reference bean
How setter injection is done when an attribute of a class is another class.
5. Constructor injection for reference bean
How constructor injection is done when an attribute of a class is another class.
6. Constructor injection – ambiguities
Ambiguities that might arise while passing values to constructor parameters through injection.
Bean
What is a Bean and also what are the various scopes available in Bean.
2. Loading multiple configuration metadata files
How to load multiple configuration metadata files in spring.
Understanding the scope and life cycle of bean.
4. Bean of Singleton scope
Example of spring bean of singleton scope
5. Bean of Prototype scope
Example of spring bean of prototype scope
6. Working with Set,List,Map and Properties as attributes
Having List, set, map and properties as attributes of a bean class.
7. List FactoryBean, Set FactoryBean and Map FactoryBean
Dealing with ArrayList,LinkedList, TreeSet,HashSet,TreeMap,HashMap
8. Using life cycle events on a bean
The life cycle events of a bean can be used to set values to the attributes of a bean using the init method.
Spring Expression Language(spEL)
Gives the basics of what is spEL and what are its features.
First hands on using spEL to create and run a simple program using spEL
3. simple spEL using Annotation
Basic hands on using spEL wherein, java annotations are used instead of xml for providing the configuration metadata.
4. Dot operator on Bean reference
Dot operator can be used to reference the attribues of the bean.
5. Bean Method invocation using spEL
Dot operator can further be used to place calls to methods inside the referenced bean.
Usage of mathematical, relational, logical and ternary operators in spEL
7. Accessing Map and List attributes in spEL
Using spEL to access Map and List attributes inside a bean.
Aspect Oriented Programming(AOP)
1. Basics of Aspect Oriented Programming(AOP)
What is AOP. Why is it such an integral part of Spring. Terminologies, concepts and set up.
2. Basic example of Spring AOP Concept using BeforeAdvice
Taking up BeforeAdvice to understand the basic working of AOP concept.
3. Spring AOP BeforeAdvice, AfterReturningAdvice
Adding on AfterReturningAdvice functionality to the previously tried out BeforeAdvice, with a slight change in the scenario.
4. Spring AOP – AfterThrows Advice
Implementing AfterThrows Advice to implement a functionality once a method throws an exception.
A one stop shop for the above 3 mentioned functionalities. A combination of Before, AfterReturning and AfterThrows functionality in Around Advice
Read More
List FactoryBean, Set FactoryBean and Map FactoryBean in Spring
We have previously seen how to deal with List, Set and Map type attributes inside a bean class. Further let us venture into having concrete List collection (ArrayList and LinkedList), Set collection(HashSet and TreeSet)Â Map collection(HashMap and TreeMap)
Step 1 : Create the POJO
File : ClassABC.java
package com.simpleCodeStuffs;

import java.util.List;
import java.util.Map;
import java.util.Set;

public class ClassABC {

	private List listVariable;
	private Map mapVariable;
	private Set setVariable;

	public List getListVariable() {
		return listVariable;
	}

	public void setListVariable(List listVariable) {
		this.listVariable = listVariable;
	}

	public Map getMapVariable() {
		return mapVariable;
	}

	public void setMapVariable(Map mapVariable) {
		this.mapVariable = mapVariable;
	}

	public Set getSetVariable() {
		return setVariable;
	}

	public void setSetVariable(Set setVariable) {
		this.setVariable = setVariable;
	}

	public String toString() {
		return ("listVariable t" + listVariable + "nsetVariable t"
				+ setVariable + "nmapVariable t" + mapVariable);
	}
}
File : Amount.java
package com.simpleCodeStuffs;

public class Amount {

	private String val;

	public String getVal() {
		return val;
	}

	public void setVal(String val) {
		this.val = val;
	}

	public String toString() {
		return ("amount bean val: " + val);
	}
}
Step 2 : Provide the configuration metadata in the xml file
SAXParseException because of it
File : Beans.xml
<?xml version="1.0" encoding="UTF-8"?>

<beans xmlns="http://www.springframework.org/schema/beans"
xmlns:xsi="http://www.w3.org/2001/XMLSchema-instance"
xmlns:util="http://www.springframework.org/schema/util"
xsi:schemaLocation="http://www.springframework.org/schema/beans
http://www.springframework.org/schema/beans/spring-beans-2.5.xsd
http://www.springframework.org/schema/util
http://www.springframework.org/schema/util/spring-util-2.5.xsd">


<bean id="abc" class="com.simpleCodeStuffs.ClassABC">
	<property name="listVariable">
		<util:list list-class="java.util.ArrayList">
			<value>1</value>
			<value>ArrayList</value>
			<ref bean="amount" />
		</util:list>
	</property>

	<property name="setVariable">
		<util:set set-class="java.util.HashSet">
			<value>2</value>
			<value>HashSet</value>
			<ref bean="amount" />
		</util:set>
	</property>

	<property name="mapVariable">
		<util:map map-class="java.util.HashMap">
			<entry key="Key1" value="3" />
			<entry key="Key2" value="HashMap" />
			<entry key="Key3" value-ref="amount" />
		</util:map>
	</property>
</bean>

<bean id="amount" class="com.simpleCodeStuffs.Amount">
	<property name="val" value="simpleCodeStuffs" />
</bean>
</beans>
Step 3 :
File : MainClass.java
package com.simpleCodeStuffs;

import org.springframework.context.ApplicationContext;
import org.springframework.context.support.ClassPathXmlApplicationContext;

public class MainClass
{
public static void main(String[] args)
{
ApplicationContext context = new ClassPathXmlApplicationContext("Beans.xml");
	ClassABC abc = (ClassABC) context.getBean("abc");
	System.out.println(abc);
}
}
Step 4: Run the application. The output is

Read More

Using life cycle events on a bean
 |
|
The life cycle events of a bean can be used to set values to the attributes of a bean using the init method.
We can associate the life cycle events of a bean to make calls to corresponding init and destroy method. The init and destroy method associated with a bean are given along with the bean definition. This way, a call is automatically made to these methods, as per the bean’s state.
Init method is called once the property of the bean is set.
Destroy method is called when the context associated with the bean is closed. This is when all the resources related to the context are cleared.
Step 1 :
Create a POJO with a method each for defining the steps to be taken at initial and destroy step. Note that the method name is user defined
File : Amount.java
package com.simpleCodeStuffs;

public class Amount {
	private String val;

	public String getVal() {
		return val;
	}

	public void setVal(String val) {
		this.val = val;
	}

	public String toString(){
		return ("amount bean val: "+val);
	}

	public void startUp(){
	     System.out.println("init() method called after properties to Amount are set. ");
	     System.out.println(toString());
	}

	public void cleanUp(){
	     System.out.println("destroy method called when application context is closed");
	     System.out.println("Releasing/destroying all resources");
	     System.out.println(toString());
	}
	}
Step 2 :
Bean definition is given along with the init and destroy values. The method names correspondingly are given here.
File : Beans.xml
<?xml version="1.0" encoding="UTF-8"?>
<beans xmlns="http://www.springframework.org/schema/beans"
	xmlns:xsi="http://www.w3.org/2001/XMLSchema-instance"
	xsi:schemaLocation="http://www.springframework.org/schema/beans
 http://www.springframework.org/schema/beans/spring-beans-3.0.xsd">
	<bean id="amount" class="com.simpleCodeStuffs.Amount" init-method="startUp"
		destroy-method="cleanUp">
		<property name="val" value="SimpleCodeStuff--HelloWorld" />
	</bean>
</beans>
Step 3 : Create the main class
File : MainClass.java
package com.simpleCodeStuffs;
import org.springframework.context.support.ClassPathXmlApplicationContext;
public class MainClass {
	public static void main(String[] args) {

	ApplicationContext context = new ClassPathXmlApplicationContext(
				new String[] { "Beans.xml" });
		Amount amt = (Amount) context.getBean("amount");
		System.out.println("printing amount in main class " + amt);

	}
}
Step 4: Run it. The output appears as below

Notice that, the destroy method has never been called. This is because the context is not closed.
Step 5 :
Make modifications in the main class to close the context. Note,we have initially used it as
  ApplicationContext context =
	   new ClassPathXmlApplicationContext(new String[] {"Beans.xml"});
Amount amt=(Amount)context.getBean("amount");
But, close() method is not defined on ApplicationContext. The method is rather defined on the implementation ClassPathXmlApplicationContext. So let us modify that part as well to implement our changes. Now the main class is
package com.simpleCodeStuffs;

import org.springframework.context.support.ClassPathXmlApplicationContext;

public class MainClass {
	public static void main(String[] args) {
	    ClassPathXmlApplicationContext context =
	   	 new ClassPathXmlApplicationContext(new String[] {"Beans.xml"});
                context.close()
//		ApplicationContext context = new ClassPathXmlApplicationContext(
//				new String[] { "Beans.xml" });
		Amount amt = (Amount) context.getBean("amount");
		System.out.println("printing amount in main class " + amt);
		context.close(); // destroy method is called here
	}
}
Step 6 : Run it. Now the output appears as :-

|
|
Read More