
Struts 2 <s:password> example
In Struts 2 , you can use the <s:password> to create a HTML password field. For example, you can declare the s:password with a key attribute or label and name attribute.
<s:password key="password" />
//or
<s:textfield label="Password" name="password" />
** UPDATE: Struts 2 Complete tutorial now available here.
In Struts 2, the “name” will map to the JavaBean property automatically. In this case, on form submit, the textbox value with name=“password” will call the corresponds Action’s setPassword(String xx) to set the value
Struts 2 <s:password> example
A page with “password” and “confirm password” fields, and do the validation to make sure the “confirm password” is match with the “password”.
1. Properties file
Two properties files to store the message.
project.properties
project.username = Username
project.password= Password
project.submit = Login
LoginAction.properties
username.required = Username Cannot be blank
password.required = Password Cannot be blank
2. Action
LoginAction.java
package com.simplecode.action;

import com.opensymphony.xwork2.ActionSupport;

public class LoginAction extends ActionSupport {

	private static final long serialVersionUID = 1L;
	private String userName;
	private String password;

	public String getUserName() {
		return userName;
	}

	public void setUserName(String userName) {
		this.userName = userName;
	}

	public String getPassword() {
		return password;
	}

	public void setPassword(String password) {
		this.password = password;
	}

	public String execute() {

		return SUCCESS;
	}

	public void validate() {
		if (userName.equals("")) {
			addFieldError("userName", getText("username.required"));
		}
		if (password.equals("")) {
			addFieldError("password", getText("password.required"));
		}
	}
}
3. View page
Result page with Struts 2 s:password tag to create a HTML password field.
login.jsp
<%@ page language="java" contentType="text/html; charset=ISO-8859-1"
	pageEncoding="ISO-8859-1"%>
<%@taglib uri="/struts-tags" prefix="s"%>
<html>
<head>
<meta http-equiv="Content-Type" content="text/html; charset=ISO-8859-1">
<title>Login</title>
</head>
<body>
	<h3>Struts 2 < s:password > Example</h3>

	<s:form action="welcome">
		<s:textfield name="userName" key="project.username" />
		<s:password name="password" key="project.password" />
		<s:submit key="project.submit" name="submit" />
	</s:form>
</body>
</html>
success.jsp
<%@ page language="java" contentType="text/html; charset=ISO-8859-1"
	pageEncoding="ISO-8859-1"%>
<%@ taglib prefix="s" uri="/struts-tags"%>
<html>
<head>
<title>Welcome Page</title>
</head>

<body>
	<h3>Struts 2 < s:password > Textbox Examplee</h3>
	<h4>
		Username : <s:property value="userName" /><br/>
		Password : <s:property value = "password"/>
	</h4>
</body>
</html>
4. struts.xml
<?xml version="1.0" encoding="UTF-8" ?>
<!DOCTYPE struts PUBLIC
"-//Apache Software Foundation//DTD Struts Configuration 2.0//EN"
"http://struts.apache.org/dtds/struts-2.0.dtd">
<struts>

	<constant name="struts.custom.i18n.resources" value="project" />
	<package name="default" extends="struts-default" namespace="/jsp">
		<action name="Login">
			<result>/jsp/login.jsp</result>
		</action>
		<action name="welcome" class="com.simplecode.action.LoginAction">
			<result name="success">/jsp/success.jsp</result>
			<result name="input">/jsp/login.jsp</result>
		</action>
	</package>
</struts>
5. Demo
http://localhost:8089/Struts2_password/

Reference
- Struts 2 password documentation
Read More
Struts 2 <s:hidden> example
 |
|
In Struts 2 , you can use the <s:hidden> tag to create a HTML hidden field.
<s:hidden name="hiddenValue" value="simplecodestuffs" />

It will render as the following HTML code.

<input type="hidden" name="hiddenValue" value="simplecodestuffs" />
Struts 2 <s:hidden> example
A page with a url hidden value, and display the hidden value after form is submitted.
** UPDATE: Struts 2 Complete tutorial now available here.
1. Folder Structure :

2. Action class
HiddenAction.java
package com.simplecode.action;

import com.opensymphony.xwork2.ActionSupport;

public class HiddenAction extends ActionSupport {

	private static final long serialVersionUID = 1L;
	private String hiddenValue;

	public String getHiddenValue() {
		return hiddenValue;
	}

	public void setHiddenValue(String hiddenValue) {
		this.hiddenValue = hiddenValue;
	}

	public String execute() {
		return SUCCESS;
	}

}
3. JSP View page
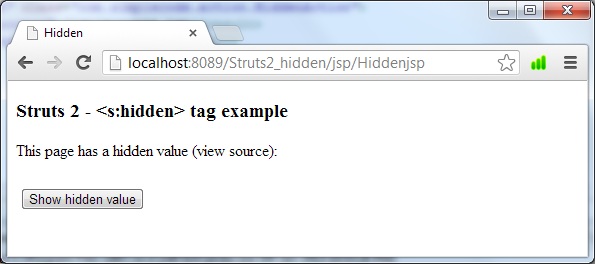
Struts 2 s:hidden tag to create a hidden value field.
hidden.jsp
<%@taglib uri="/struts-tags" prefix="s"%>
<html>
<head>
<title>Hidden</title>
</head>
<body>
	<h3>Struts 2 - <s:hidden> tag example</h3>
	This page has a hidden value (view source):
	<s:form action="Hidden">
		<h4>

			<s:hidden name="hiddenValue" value="simplecodestuffs" />
			<s:submit key="project.submit" name="submit" />
		</h4>
	</s:form>
</body>
</html>
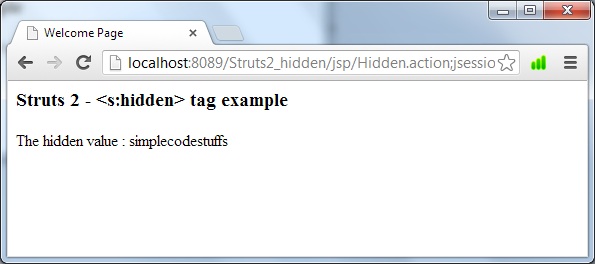
success.jsp
<%@ taglib prefix="s" uri="/struts-tags"%>
<html>
<head>
<title>Welcome Page</title>
</head>

<body>
	<h3>Struts 2 - <s:hidden> tag example</h3>

	The hidden value :
	<s:property value="hiddenValue" />

</body>
</html>
4. struts.xml
<?xml version="1.0" encoding="UTF-8" ?>
<!DOCTYPE struts PUBLIC
"-//Apache Software Foundation//DTD Struts Configuration 2.0//EN"
"http://struts.apache.org/dtds/struts-2.0.dtd">
<struts>

	<constant name="struts.custom.i18n.resources" value="project" />
	<package name="default" extends="struts-default" namespace="/jsp">
		<action name="Hiddenjsp">
			<result>/jsp/hidden.jsp</result>
		</action>
		<action name="Hidden" class="com.simplecode.action.HiddenAction">
			<result name="success">/jsp/success.jsp</result>
			<result name="input">/jsp/hidden.jsp</result>
		</action>
	</package>
</struts>
5. Demo
http://localhost:8089/Struts2_hidden/jsp/Hiddenjsp
Output :
|
|
Reference
- Struts 2 hidden field documentation
Read More
Struts 2 <s:head> example
The <s:head /> tag should be placed in the headsection of the HTML page. The s:head tag automatically generates links to the css and javascript libraries that are necessary to render the form elements.
This tag is used to output the HTML head information like encoding, CSS or JavaScript file. See the following snippet
** UPDATE: Struts 2 Complete tutorial now available here.
<%@ taglib prefix="s" uri="/struts-tags" %>
<html>
<head>
<s:head />
</head>
Here Since no theame is provided in <s:head> tag ,it uses the default xhtml theme, it will render the output according to the template\xhtml\head.ftl file as shown below
<html>
<head>
<link rel="stylesheet" href="/your_project/struts/xhtml/styles.css" type="text/css"/>
<script src="/your_project/struts/utils.js" type="text/javascript"></script>
</head>
To include your own user defiend js or css file, just add it into the template\xhtml\head.ftl template file, and output it via <s:head>tag
The tag also includes the option to set a custom datepicker theme if needed.
<head>
   <title>My page</title>
   <s:head theme="ajax" calendarcss="calendar-green"/>
 </head>
If you use the ajax theme you can turn a debug flag by setting the debug parameter to true.
<head>
   <title>My page</title>
   <s:head theme="ajax" debug="true"/>
 </head>
Read More
Struts 2 datetimepicker example
|
|
Click here to learn about Datetime picker in struts 2 using jquery jar
To create a date time pick component in struts 2, please follow this two steps :
1. Add struts2-dojo-plugin.jar in your class path.
2. Include the “struts-dojo-tags” tag and its header in your jsp page
** UPDATE: Struts 2 Complete tutorial now available here.
<%@ taglib prefix="sx" uri="/struts-dojo-tags" %>
<html>
<head>
<sx:head />
</head>
Action class
DatePickerAction.java
package com.simplecode.action;

import java.util.Date;

import com.opensymphony.xwork2.Action;

public class DatePickerAction implements Action
{
	private Date birthDay;

	public Date getBirthDay()
	{
		return birthDay;
	}

	public void setBirthDay(Date birthDay)
	{
		this.birthDay = birthDay;
	}

	public String execute() throws Exception
	{
		return SUCCESS;
	}
}
JSP Page
datepicker.jsp
<%@ taglib prefix="s" uri="/struts-tags"%>
<%@ taglib prefix="sx" uri="/struts-dojo-tags"%>
<html>
<head>
<title>Date Picker</title>
<sx:head />
</head>
<body>
<h3>Struts2 Date Picker example</h3>
<s:form action="resultAction" method="POST">
<sx:datetimepicker name="birthDay" label="Format (dd-MM-yyyy)"
	displayFormat="dd-MM-yyyy" required="true" />
<s:submit value="submit" name="submit" />
</s:form>
</body>
</html>
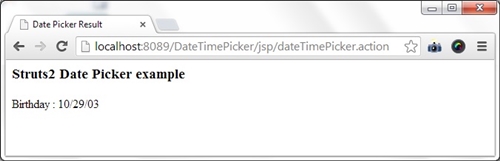
result.jsp
<%@ taglib prefix="s" uri="/struts-tags"%>
<html>
<head>
<title>Date Picker Result</title>
</head>
<body>
<h3>Struts2 Date Picker example</h3>
Birthday : <s:property value="birthDay" />
</body>
</html>
struts.xml
<?xml version="1.0" encoding="UTF-8" ?>
<!DOCTYPE struts PUBLIC
"-//Apache Software Foundation//DTD Struts Configuration 2.0//EN"
"http://struts.apache.org/dtds/struts-2.0.dtd">

<struts>
<package name="" namespace="/jsp" extends="struts-default">
<action name="dateTimePicker" class="com.simplecode.action.DatePickerAction">
	<result name="success">/jsp/result.jsp</result>
</action>
</package>
</struts>
Demo
On running the above example
http://localhost:8089/Struts2_DatePicker/
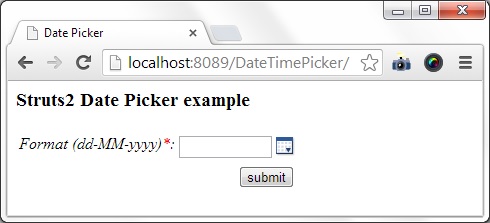
Now on clicking the date picker icon, the calendar gets displayed as shown below.
![]()
On selecting the date and clicking the submit button, the following output is obtained
Suppose you want to include a static date in jsp, then the following code can be used
<sx:datetimepicker name="staticDateFromJsp" label="Format (dd-MMM-yyyy)"
	displayFormat="dd-MMM-yyyy" value="%{'1989-12-19'}" />
Suppose you want to include a static date in jsp, then the following code can be used
<sx:datetimepicker name="todaysDate" label="Format (dd-MMM-yyyy)"
	displayFormat="dd-MMM-yyyy" value="%{'today'}" />
So now when you run the application, these values will be displayed in the jsp page. Inorder to make this values appear in the result page, you just need to include the getter and setter for staticDateFromJsp and todaysDate in the action class, and render it via property tag in result.jsp page
Click here to learn about Datetime picker in struts 2 using jquery jar
Struts 2 -Development Mode Example
Struts 2 has a setting which can be set to true or false in struts.properties called devMode. When this setting is enabled, Struts 2 will provide additional logging and debug information, which can significantly speed up development.
** UPDATE: Struts 2 Complete tutorial now available here.
Enable the Strut2 development mode
Set the struts.devMode value to true, either in Struts properties file or XML configuration file.
struts.properties
struts.devMode = true
struts.xml
<struts>
 	<constant name="struts.devMode" value="true" />
</struts>
Note :
1.By default, the development mode is disabled, because it has a significant impact on performance, since the entire configuration will be reloaded on every request.
2. The development mode is only suitable in development or debugging environment. In production environment, you have to disable it. As It will caused significant impact on performance, because the entire application configuration, properties files will be reloaded on every request, many extra logging and debug information will be provide also.
Disable the Strut2 development mode
Set the struts.devMode to false, either in Struts properties file or XML configuration file.
struts.properties
struts.devMode = false
struts.xml
<struts>
 	<constant name="struts.devMode" value="false" />
</struts>
Reference
- Struts 2 development mode documentation
Read More
Struts2 Configuration file and its roles
Struts 2 application is mainly dependent on two configuration files.
- web.xml
- struts.xml
1. web.xml
web.xml is common for all J2EE application and in case of Struts 2, it is used in the configuration of StrutsPrepareAndExecuteFilter, TilesListener etc.
When any request comes for struts web application, that request is first handled by web.xml file, where we do an entry for “StrutsPrepareAndExecuteFilter”, which dispatch a request object to appropriate action name.
StrutsPrepareAndExecuteFilter is having following responsibility :
1. Executing struts actions name
2. Cleaning up the ActionContext
3. Serving static content
4. Invoking interceptor chain for the request life-cycle
We are defining StrutsPrepareAndExecuteFilter entry in web.xml as:
	<filter>
		<filter-name>struts2</filter-name>
		<filter-class>
		org.apache.struts2.dispatcher.ng.filter.StrutsPrepareAndExecuteFilter
		</filter-class>
	</filter>
	<filter-mapping>
		<filter-name>struts2</filter-name>
		<url-pattern>/*</url-pattern>
	</filter-mapping>
2. struts.xml
The struts.xml file contains information about all the Action classes of application, configured interceptors for each Action class, Result for each Action execution. This file also describes the package structure of the application in which different modules are defined. Application specific constant like resource file, devMode, custom extension, theme settings also configured in this file. Below is the sample struts.xml file. All terms will be explained in their respective article.
** UPDATE: Struts 2 Complete tutorial now available here.
<struts>
<constant name="struts.devMode" value="true" />
<package name="default" extends="struts-default" namespace="/jsp">
<action name="Login">
        <result>/jsp/login.jsp</result>
</action>
<action name="welcome" class="com.simpleccode.action.LoginAction">
        <result name="success">/jsp/success.jsp</result>
        <result name="error">/jsp/error.jsp</result>
</action>
</package>
</struts>
Read More